
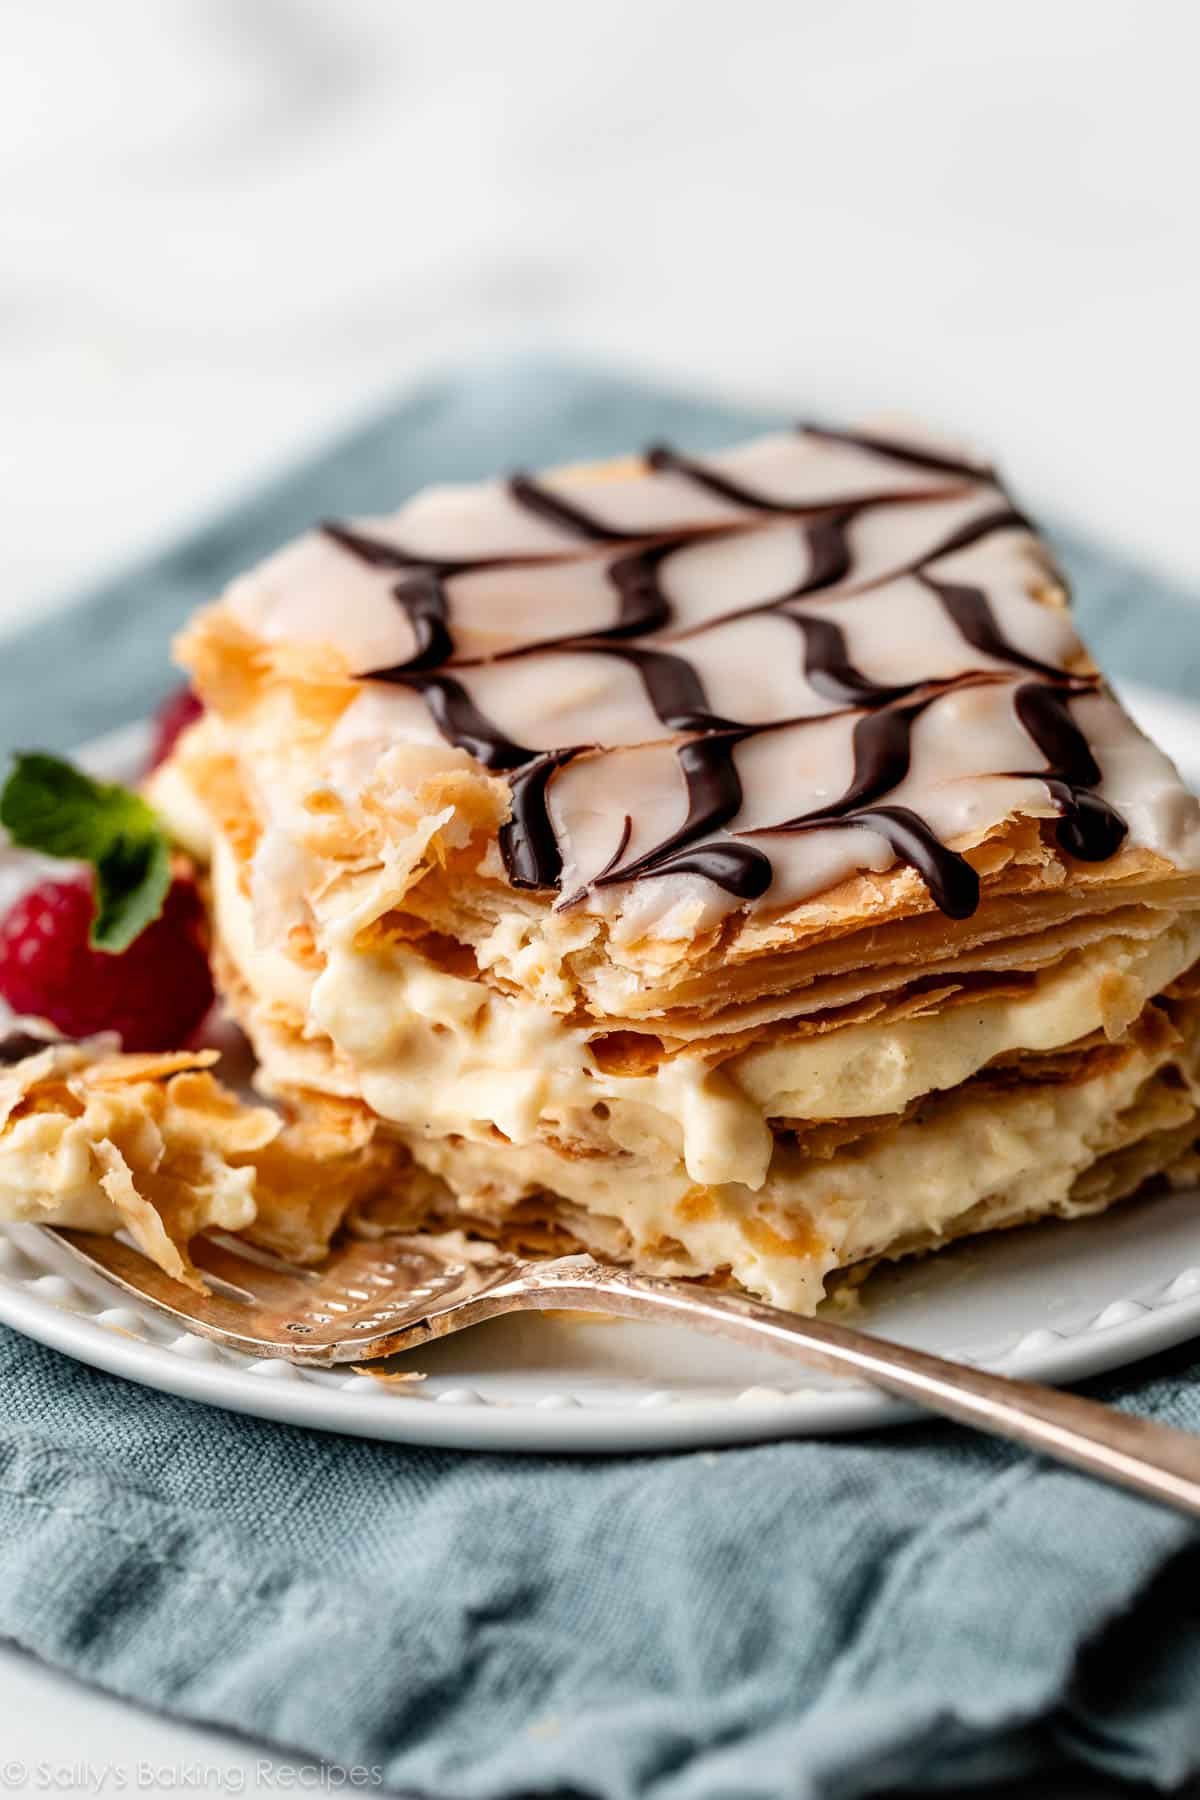
From the numerous flaky layers of delicate puff pastry, to the creamy clouds of vanilla pastry cream, to the ornamental marbled icing, mille-feuille is a formidable dessert worthy of a special day. Discover ways to make this traditional European pastry in your personal kitchen—no difficult elements or pastry college diploma wanted. I embody thorough explanations within the weblog put up under, in addition to many step pictures within the recipe, to set you up for fulfillment.
Able to majorly impress your self and anybody fortunate sufficient to be a style tester? Let’s make an ornate-looking (however completely approachable) pastry dessert.
What Is Mille Feuille (and How Do You Pronounce It)?
The French “mille feuille” (pronounced meel foy) interprets to a thousand sheets or leaves, an outline of this dessert’s many whisper-thin pastry layers. It’s additionally typically referred to as a “Napoleon” or a “custard slice” relying on the filling and/or area. (There are so many variations!) It doesn’t matter what you name it, this eye-catching European pastry is a formidable sight to behold in a pâtisserie show case.
I’ve beloved poring over recipes on-line, together with from The Spruce Eats, Erin Jeanne McDowell’s on Food52, Bake from Scratch, Preppy Kitchen’s mille feuille, and Prue Leith’s on GBBO. I got down to make my very own model, utilizing a few these recipes as my inspiration.
And right now I’m going to show you tips on how to make it, too. Similar to with home made croissants, it might appear to be a frightening baking problem, however in the event you take your time with a number of the technical steps, I promise it’s doable! The method does take time, however the steps may be damaged up over a few days.
Tips on how to Make Mille-Feuille (Millefeuille or Mille Feuille)
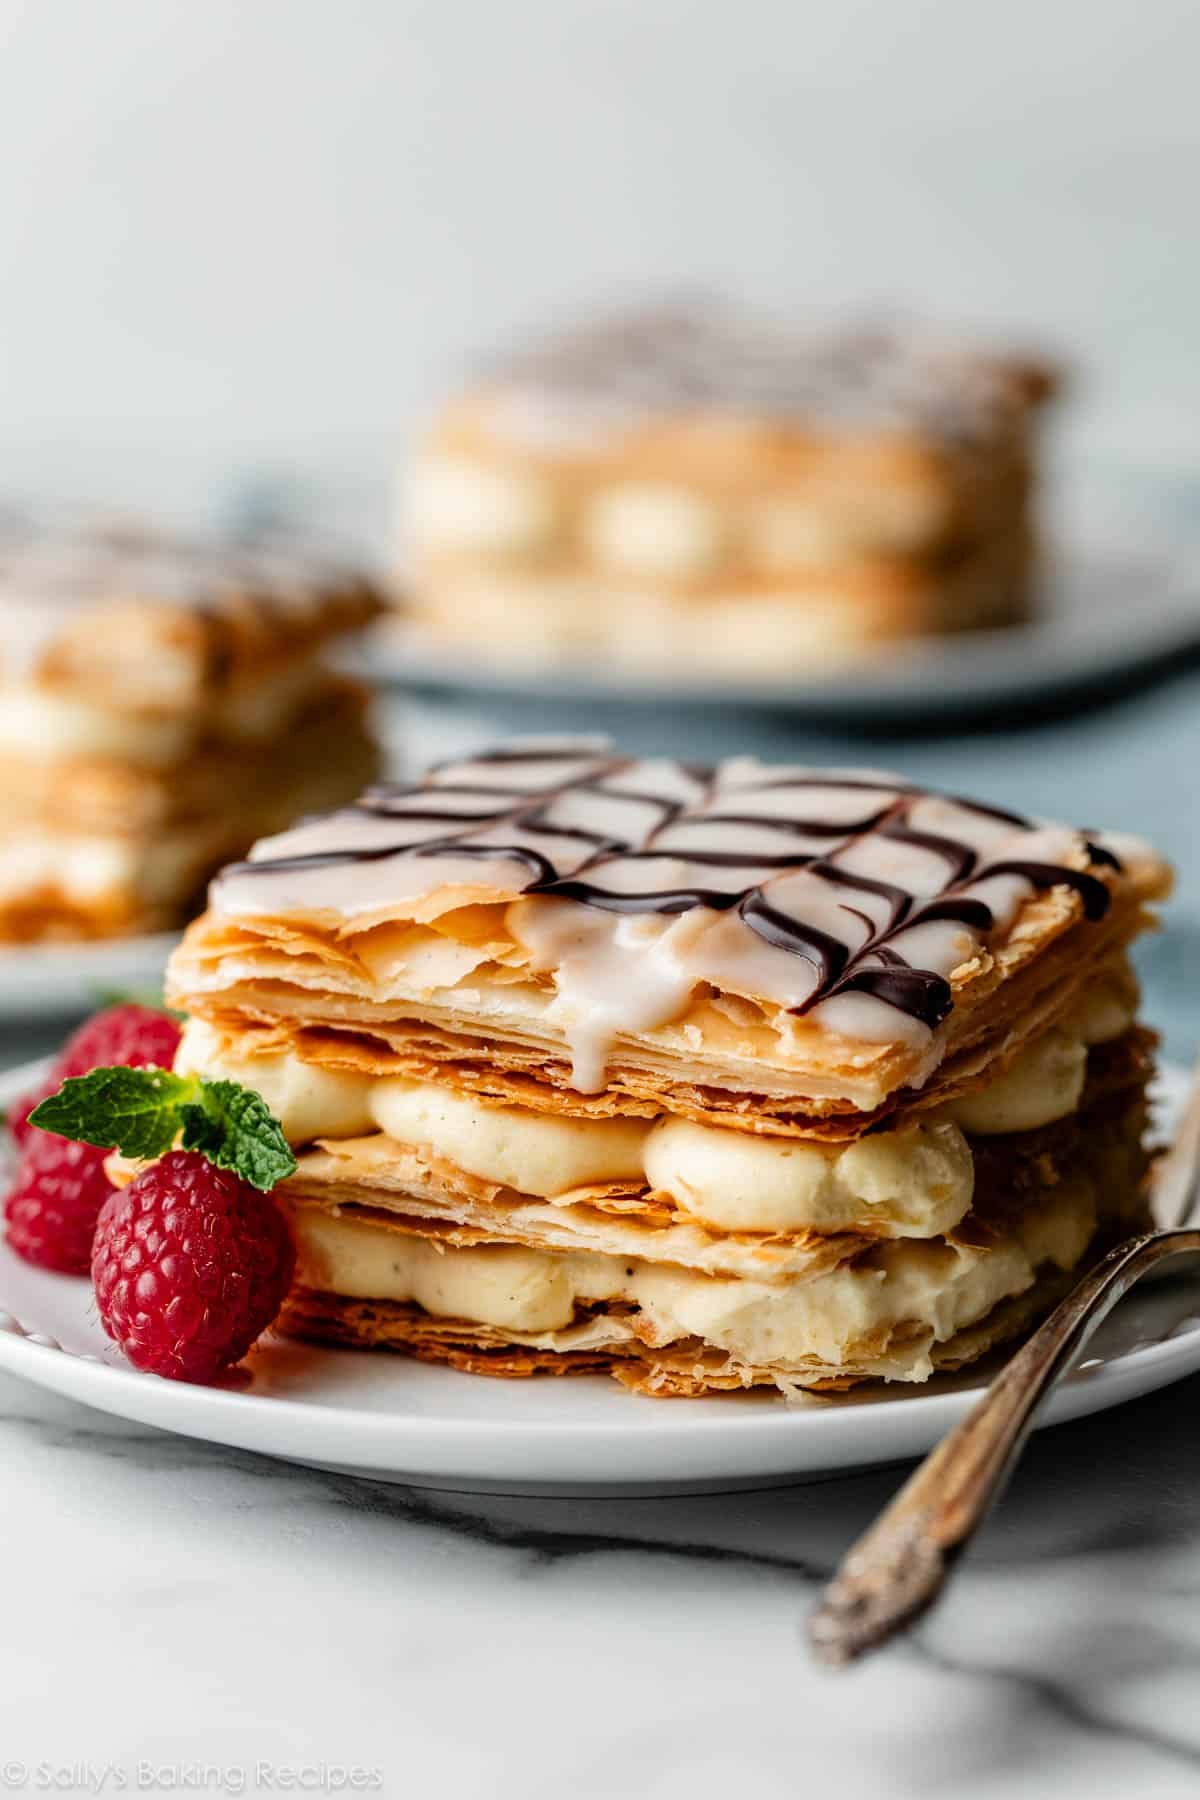
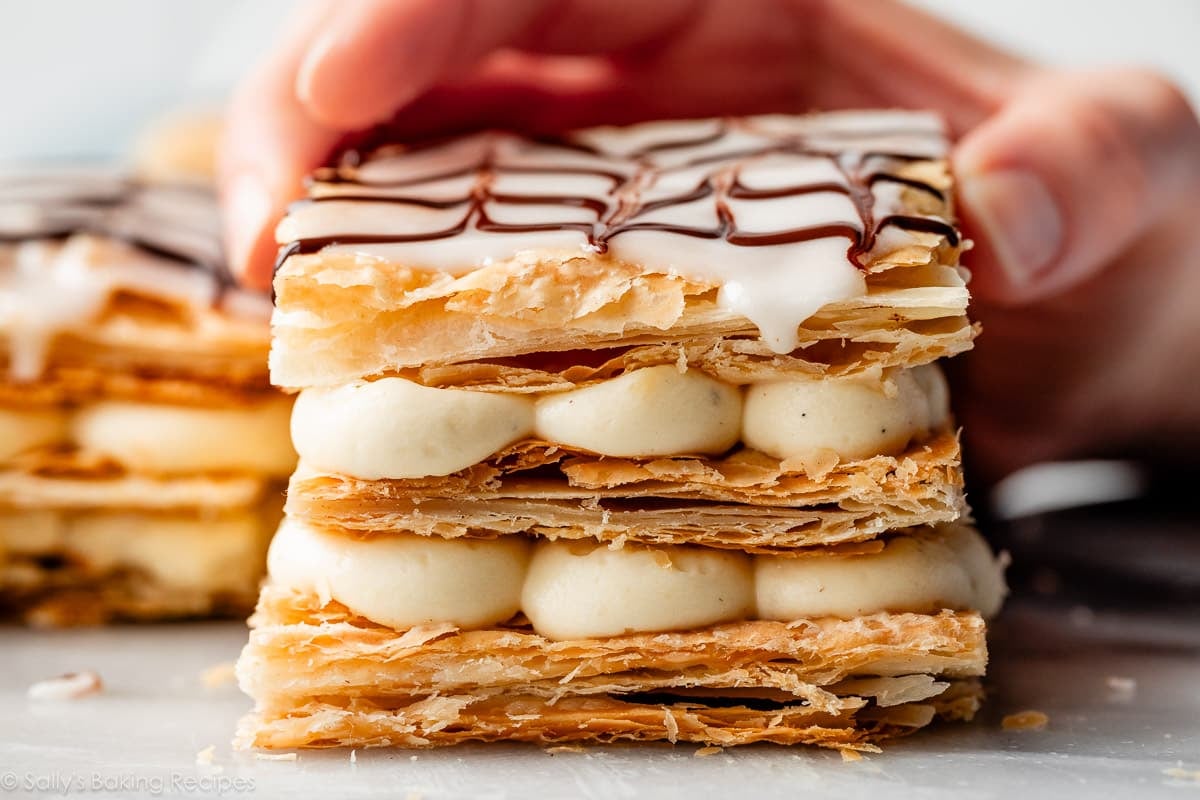
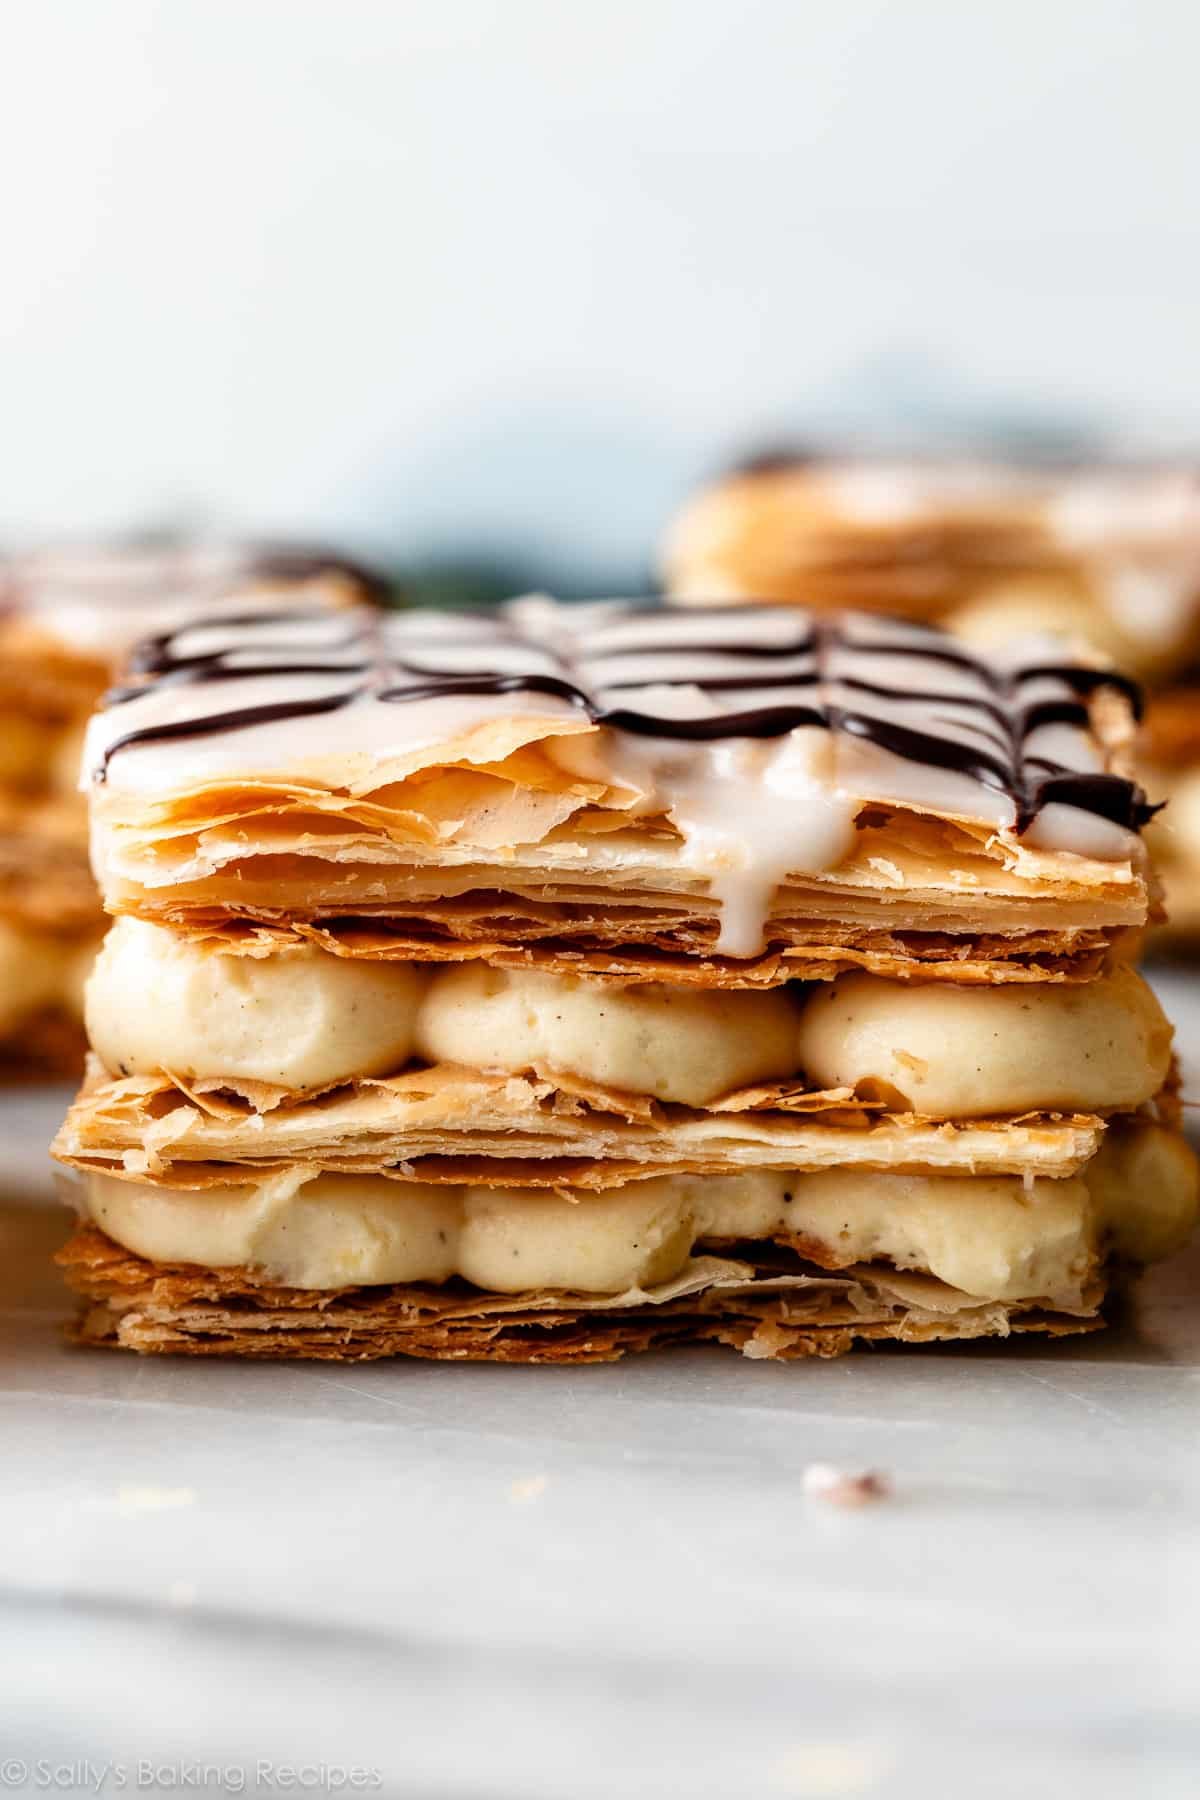
In the present day’s mille-feuille is made up of:
- 3 layers of baked puff pastry
- 2 layers of pastry cream
- 1 layer of marbled icing
Right here is every thing it’s essential to make this recipe:
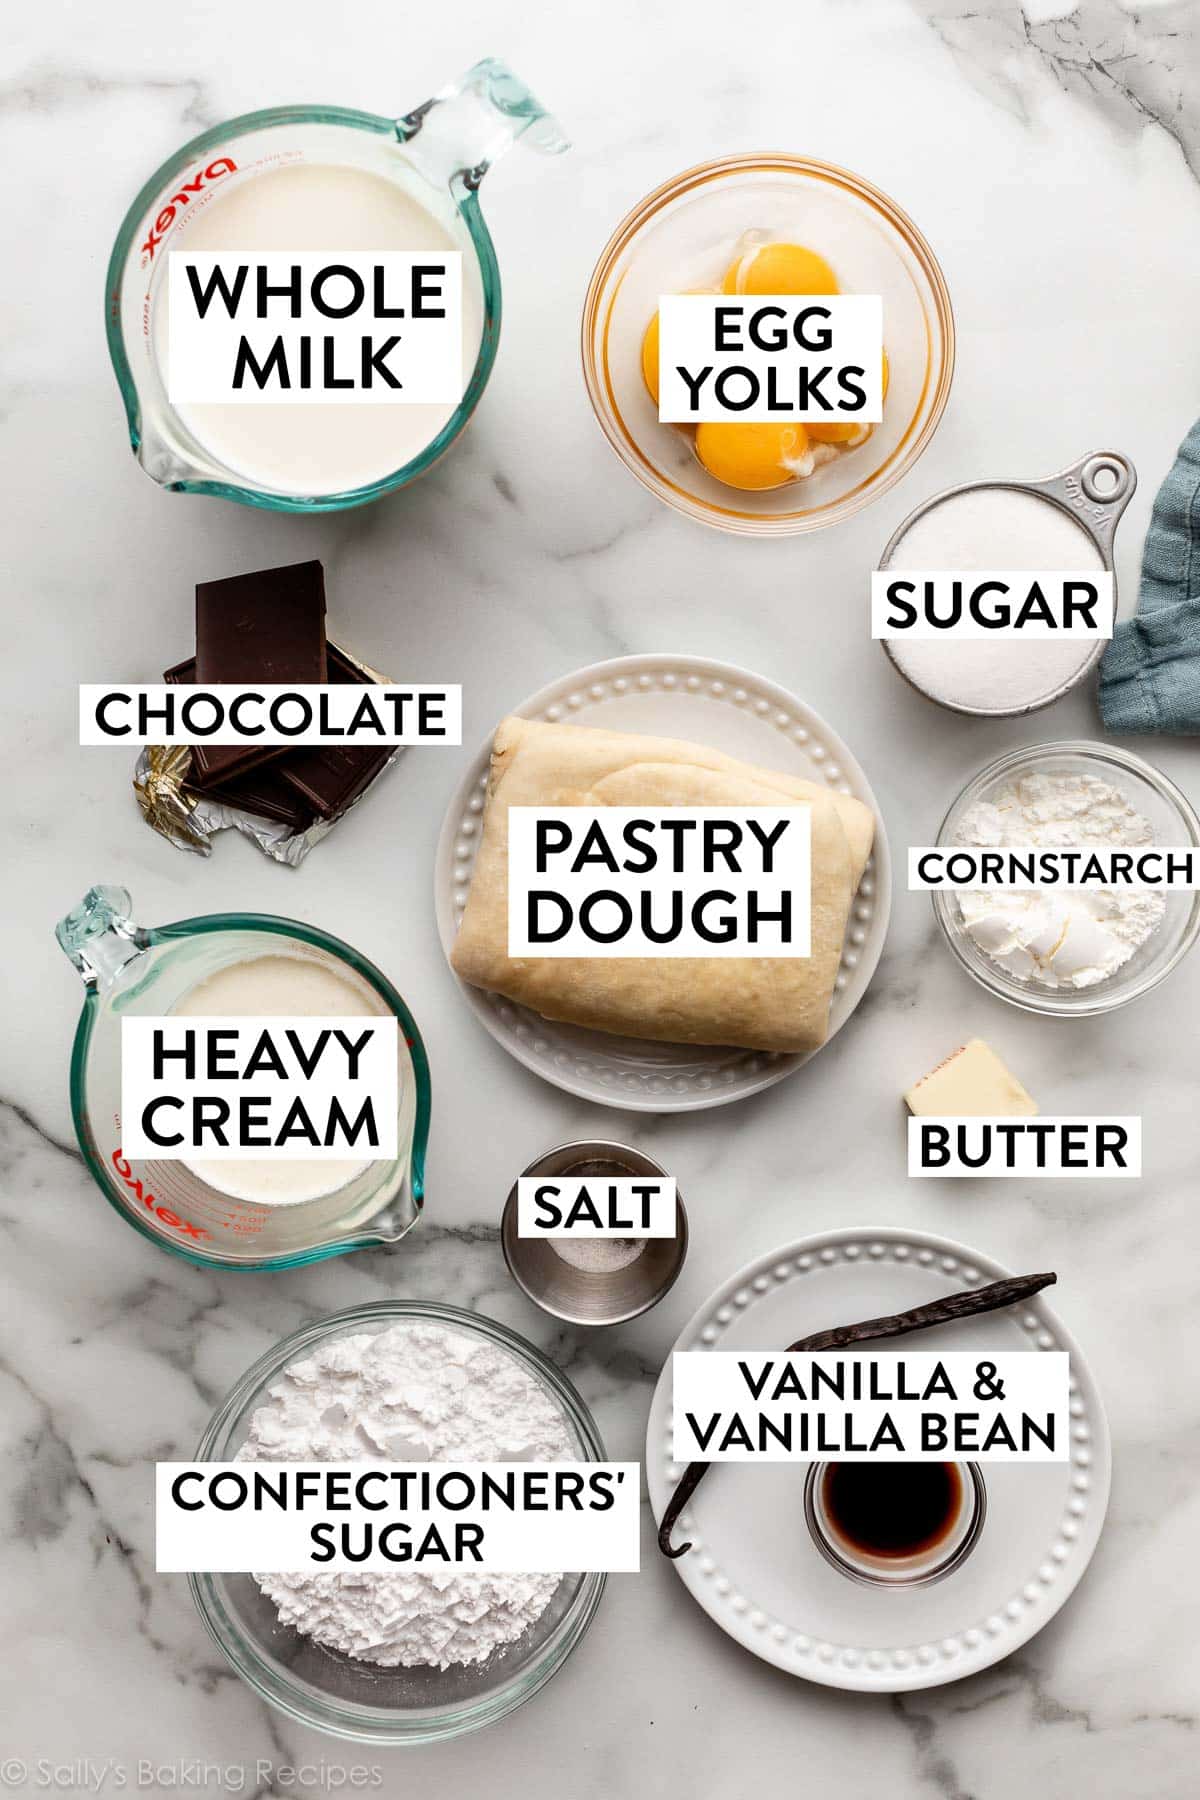
Pastry Cream Filling
Let’s begin with the filling as a result of it has cooling and chilling steps concerned; it’s environment friendly to make this primary so it’s prepared when the baked puff pastry layers are prepared. (You may also make it a day forward.)
Pastry cream, or crème pâtissière, is a vanilla custard-like filling you should use for treats like pies, eclairs, doughnuts, and extra. You prepare dinner it on the range identical to you put together the pudding filling for banana cream pie. It’s fairly thick after chilling, so that you normally want to provide it a stir to {smooth} it out once more. On this layered mille-feuille, we really take it a step additional and add whipped cream. This significantly lightens up the feel, making it velvety-smooth—assume home made whipped cream, however richer and extra substantial. While you add whipped cream to pastry cream, I discovered, it’s referred to as crème légère, or lightened cream. (It will also be referred to as diplomat cream or crème diplomate, however that typically consists of gelatin.)
When you’ve ever made Boston cream pie, you’re acquainted with pastry cream. I deviated from that recipe, although. It’s a cake filling there, so it’s actually sturdy and thick. I wanted much less pastry cream, and I wished a lighter consistency for this dessert’s filling.
The detailed directions and step pictures are within the recipe under, however let me share some key steps and success ideas so you will have a greater understanding.
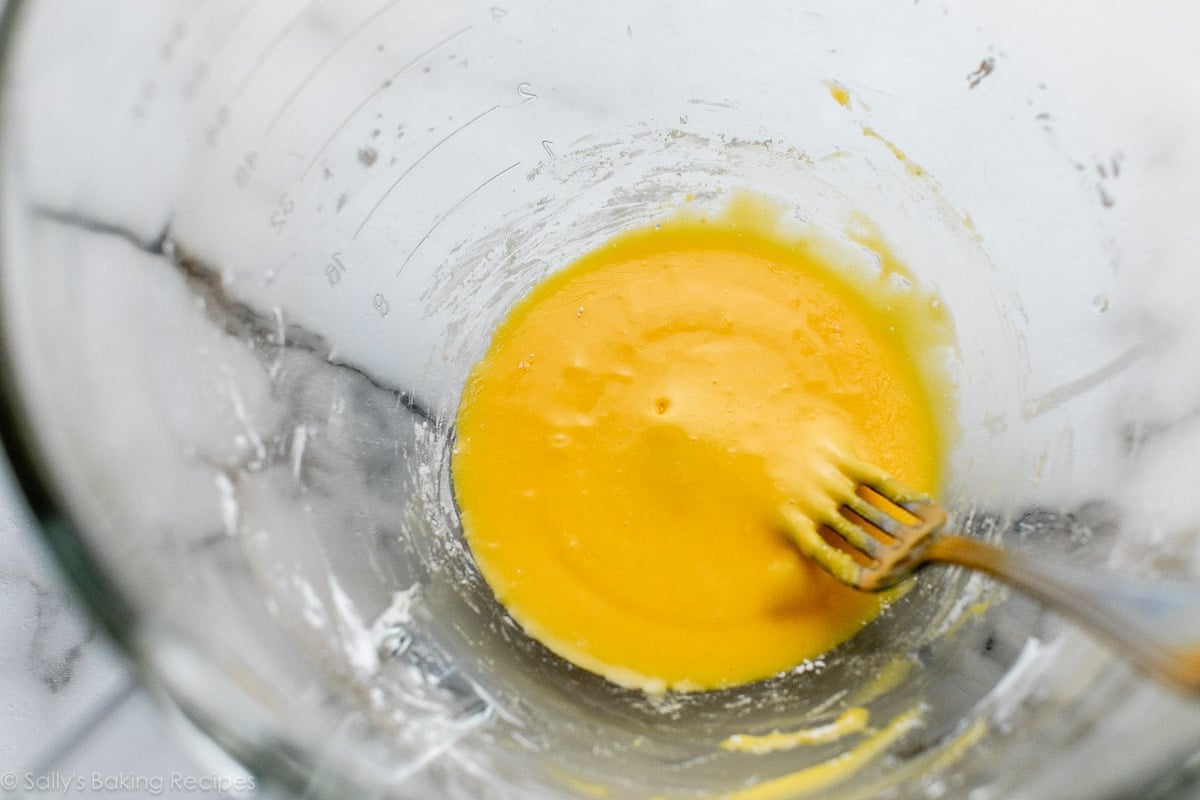
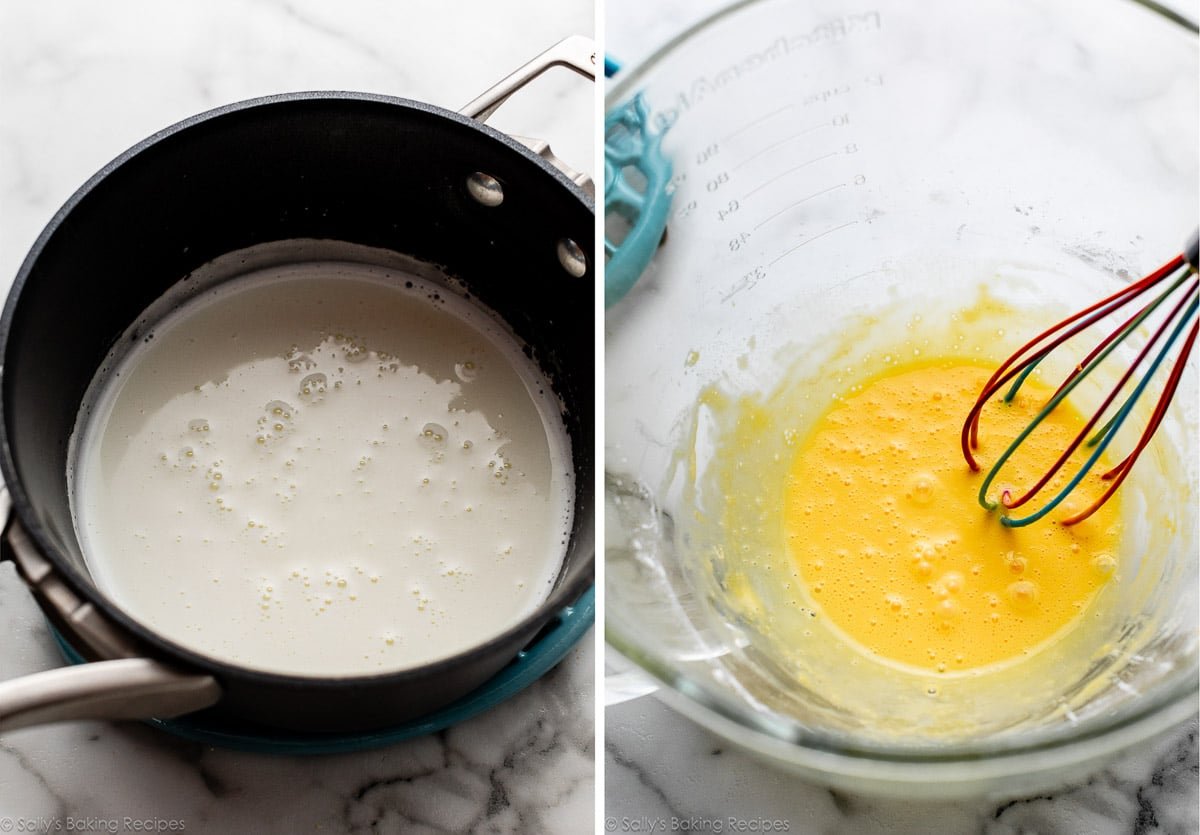
- Cornstarch and egg yolks thicken the cream. Mix these first, after which transfer to the range. You’ll simmer entire milk and granulated sugar collectively, after which take away it from warmth and mood the egg yolks.
- Tempering is vital right here. To mood, slowly pour the new milk combination into the egg yolks and cornstarch, whisking continually. This fastidiously and slowly raises the egg yolks’ temperature. The aim of tempering is to stop scrambling them.
- Pressure it. Simply in case there are some solids! Pour the entire combination again into the saucepan by means of a fine-mesh sieve, to pressure out any solids which will have fashioned.
- Carry it to a boil. At first it received’t seem to be it’s thickening a lot, simply getting frothy, however as quickly because it reaches a boil with large bubbles bursting on the floor, it’s going to thicken up just about instantly.
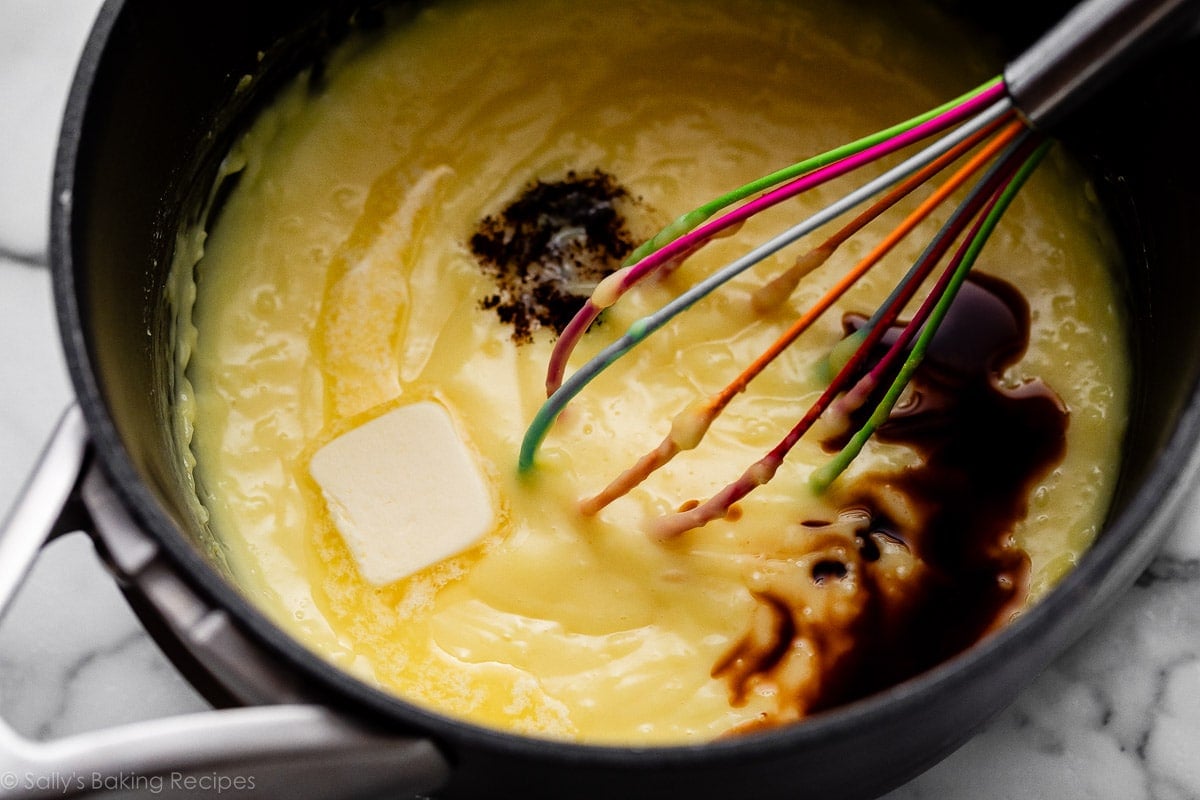
- Take away from warmth & add taste. Stir in butter, vanilla extract, vanilla bean + a pinch of salt.
Then you definately’ll have to refrigerate it so it thickens.
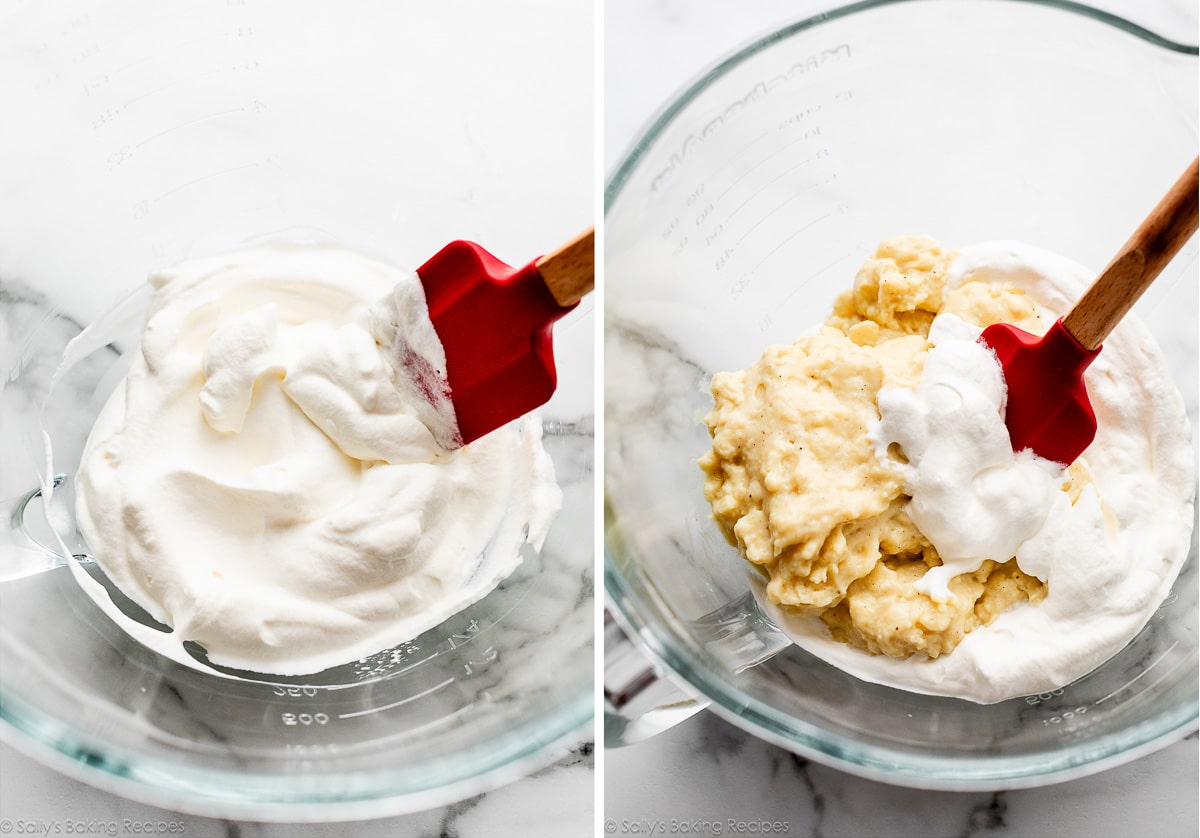
That is the velvet-rich pastry cream earlier than chilling:
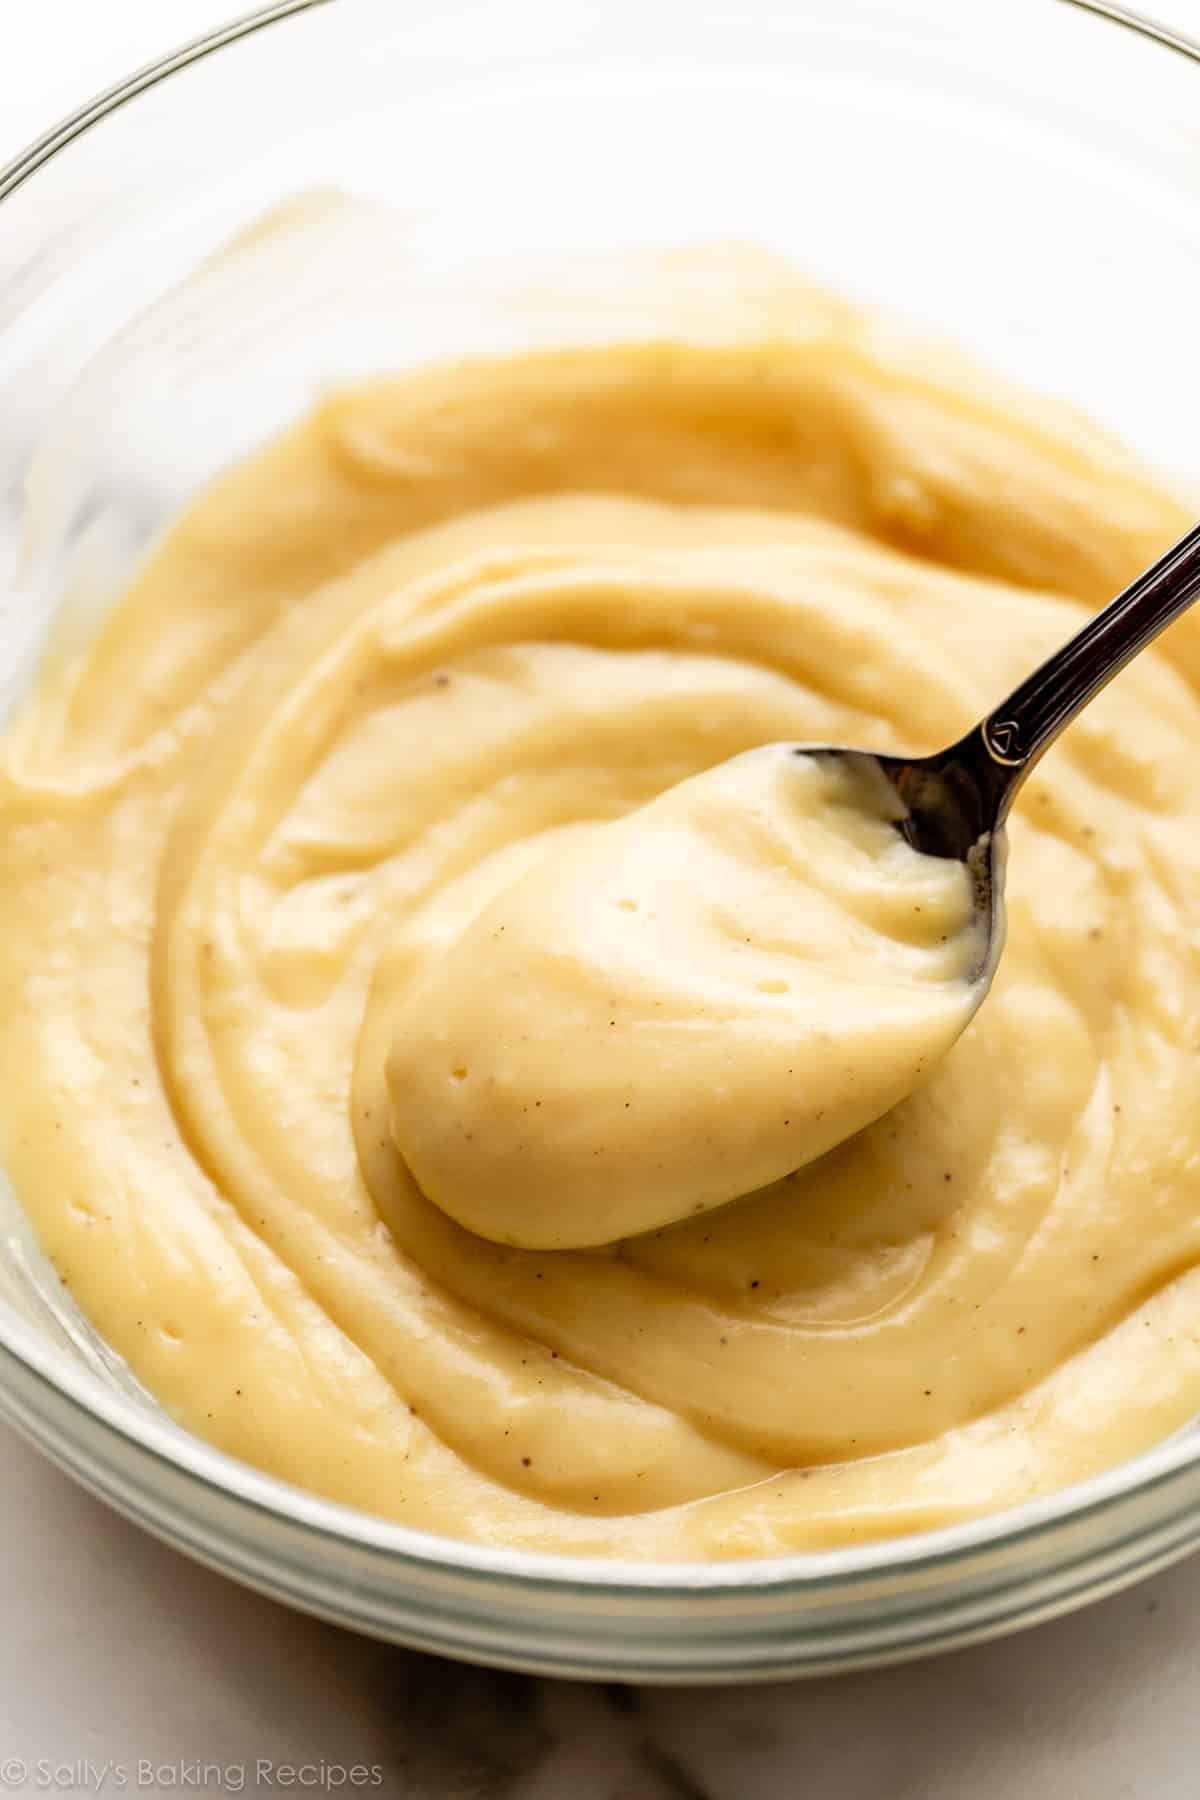
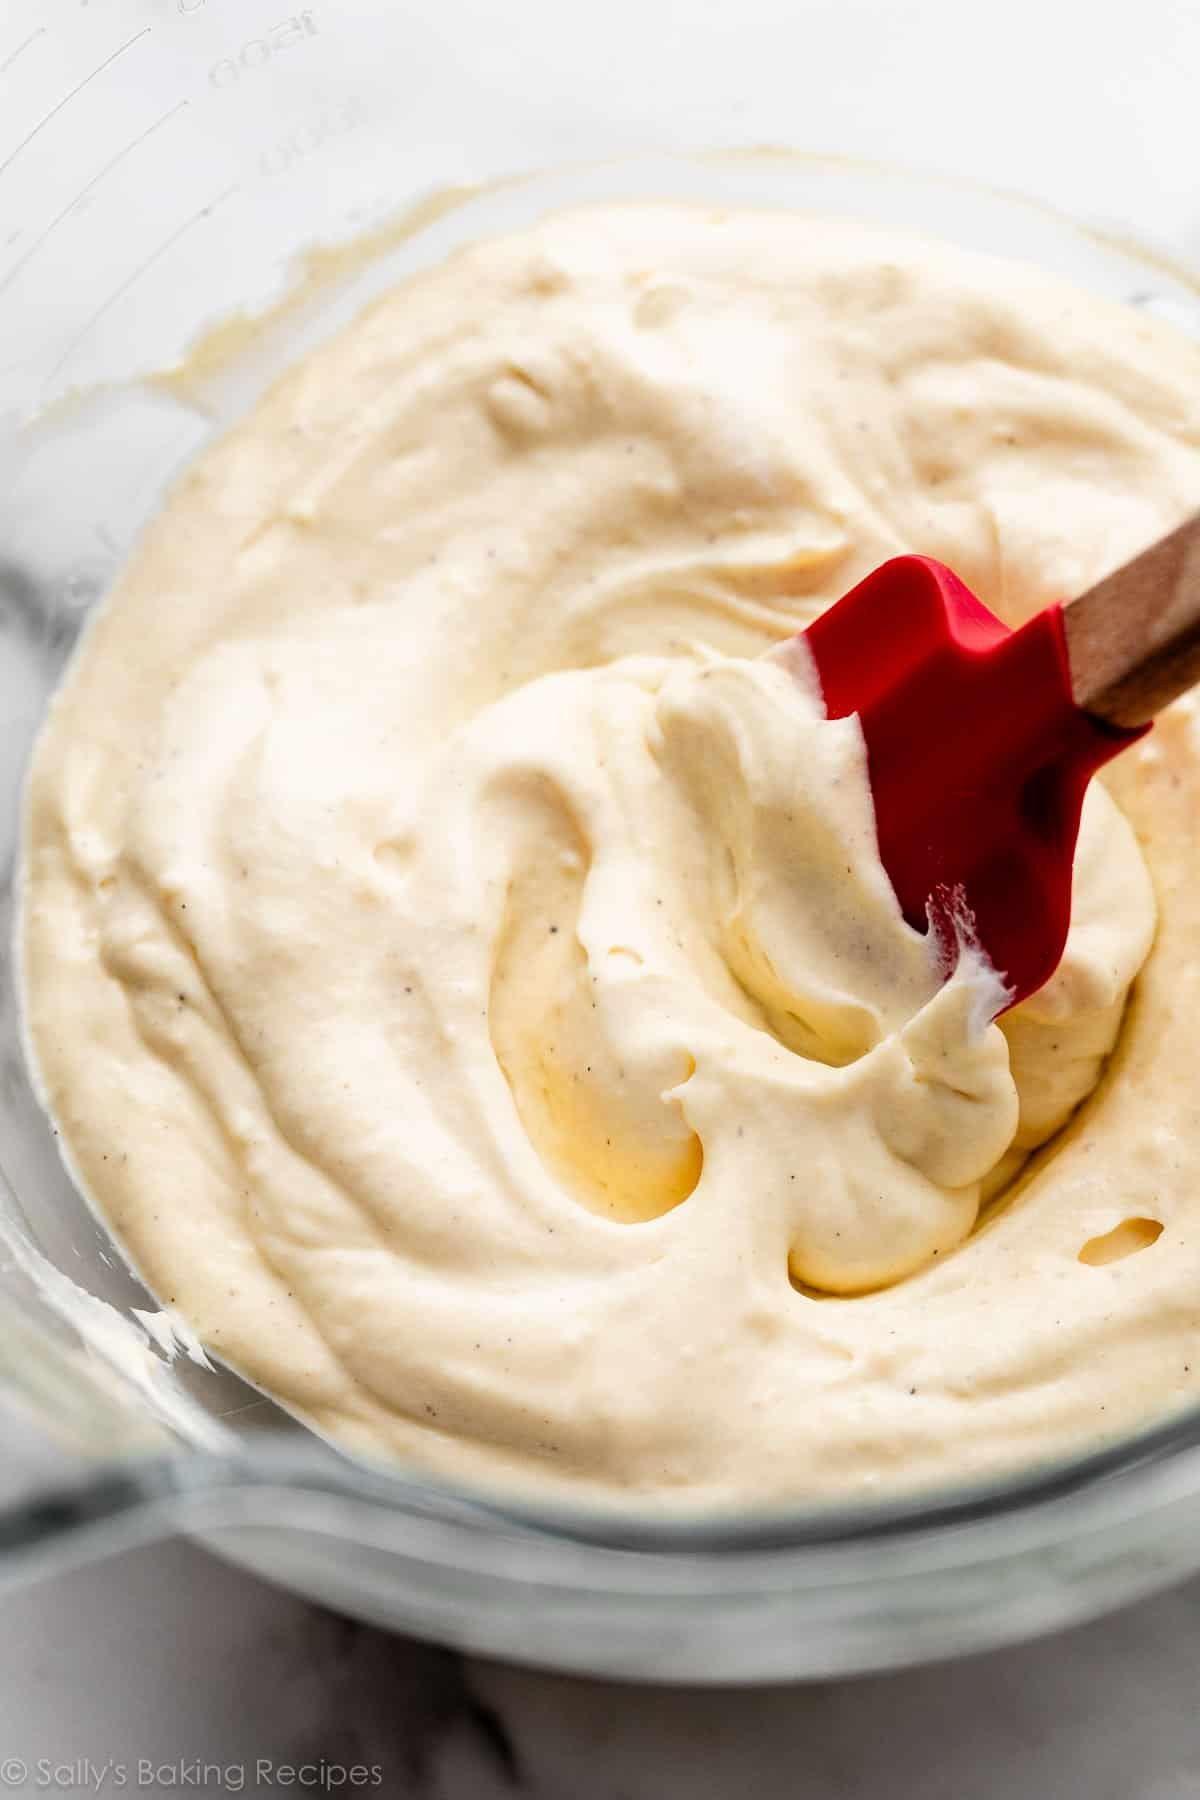
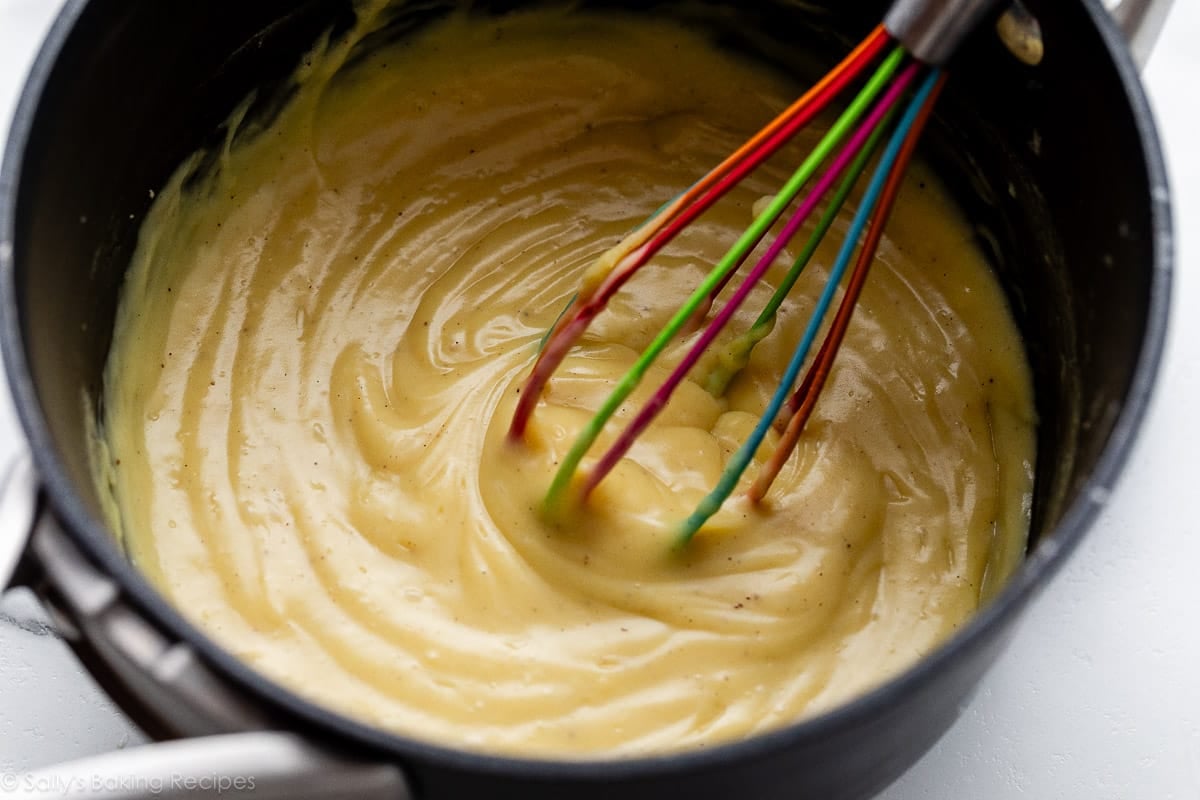
Chill it within the fridge for at least 3 hours or in a single day. It’s going to agency up loads throughout this time. Give it a stir after which mix it with whipped cream. Chill it as soon as once more for 1 hour, so it’s good and thick for piping between the flaky pastry layers.
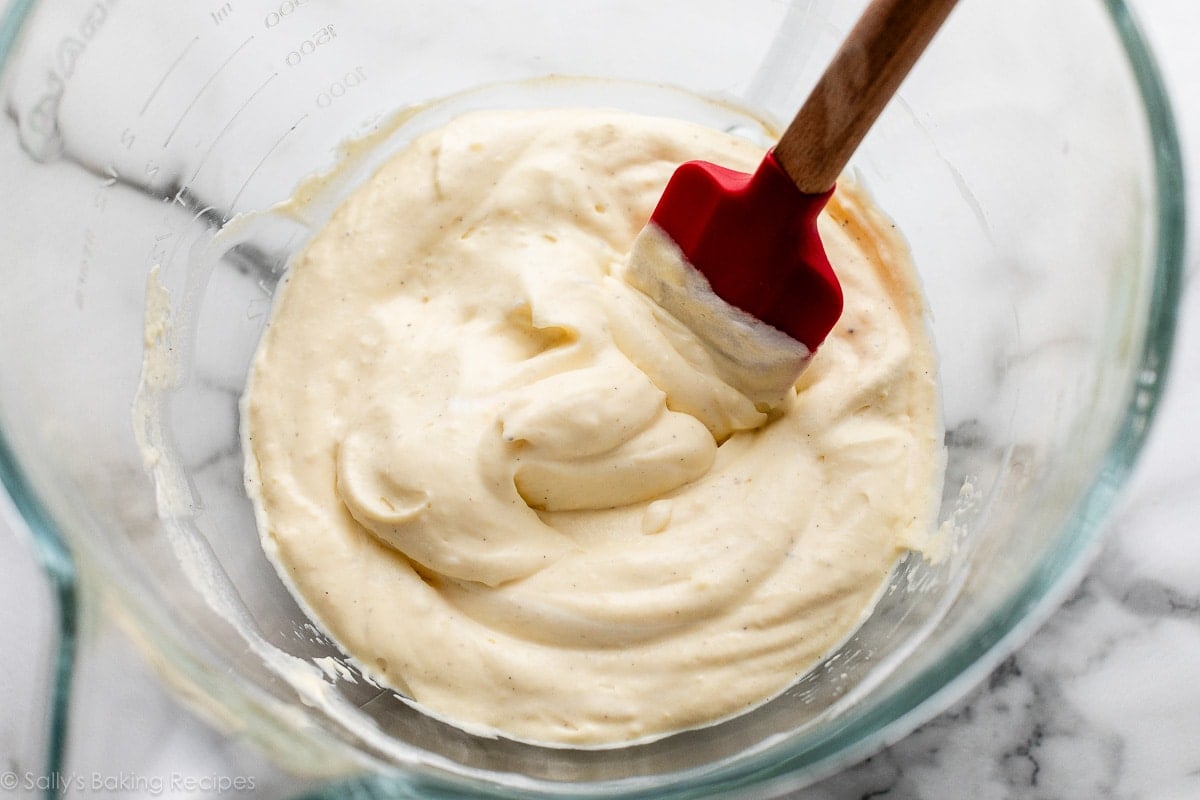
And that is the pastry cream after combining with whipped cream:
Puff Pastry Layers
I’m utilizing my home made tough puff pastry, however you’ll be able to completely take the shortcut of utilizing store-bought puff pastry. If frozen, thaw it in line with bundle directions earlier than you start.
When you’d prefer to make the tough puff pastry from scratch, you want simply 5 elements: flour, sugar, salt, chilly butter, and chilly water. All the identical elements as butter pie crust, however there’s the added rolling and folding course of, just like biscuits, which supplies us all of these flaky layers.
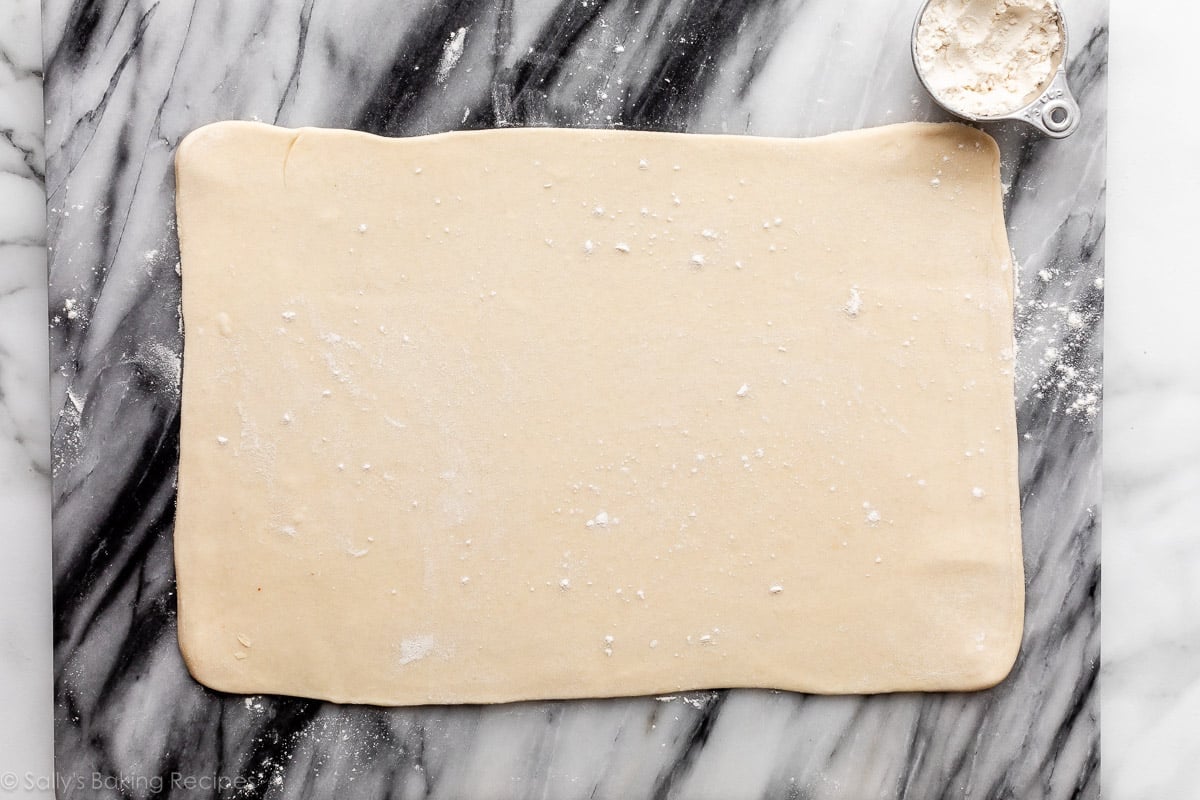
After you have your store-bought dough thawed, or the home made dough chilled (after the second refrigeration as detailed within the tough puff pastry put up), it’s time to roll it out, and also you’ll discover these precise directions under within the recipe. Place the rolled-out dough on a lined baking sheet and dock it with a fork, identical to you’d when par-baking pie crust.
That is the home made puff pastry dough able to bake:
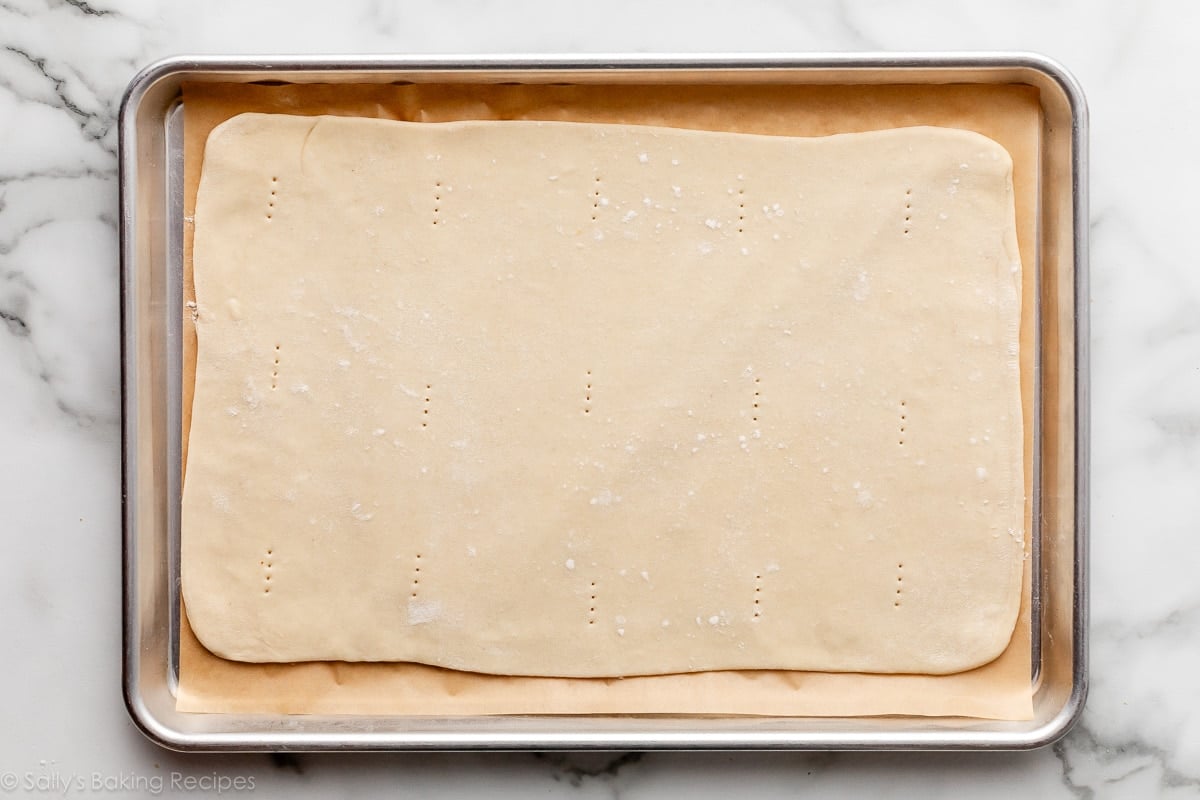
That is the store-bought puff pastry dough able to bake (you’ll join the two sheets that normally are available in a field):
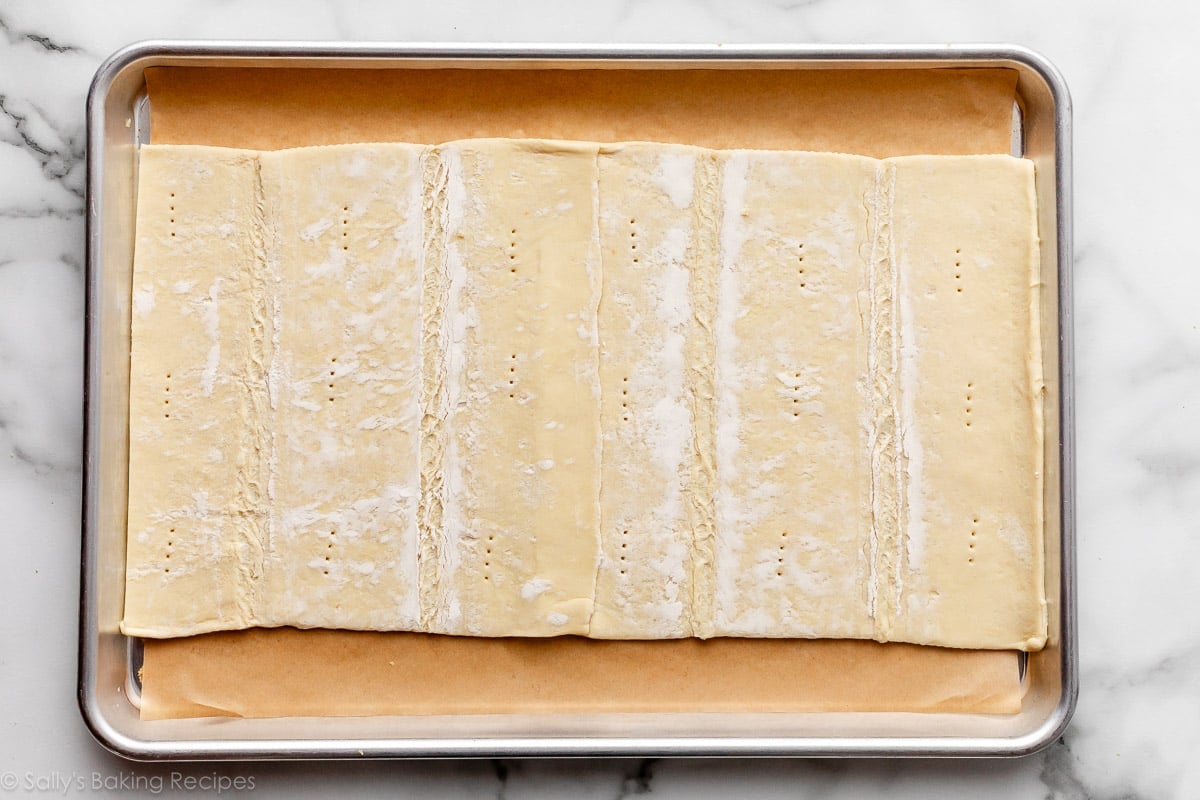
An Odd Step: Weigh It Down!
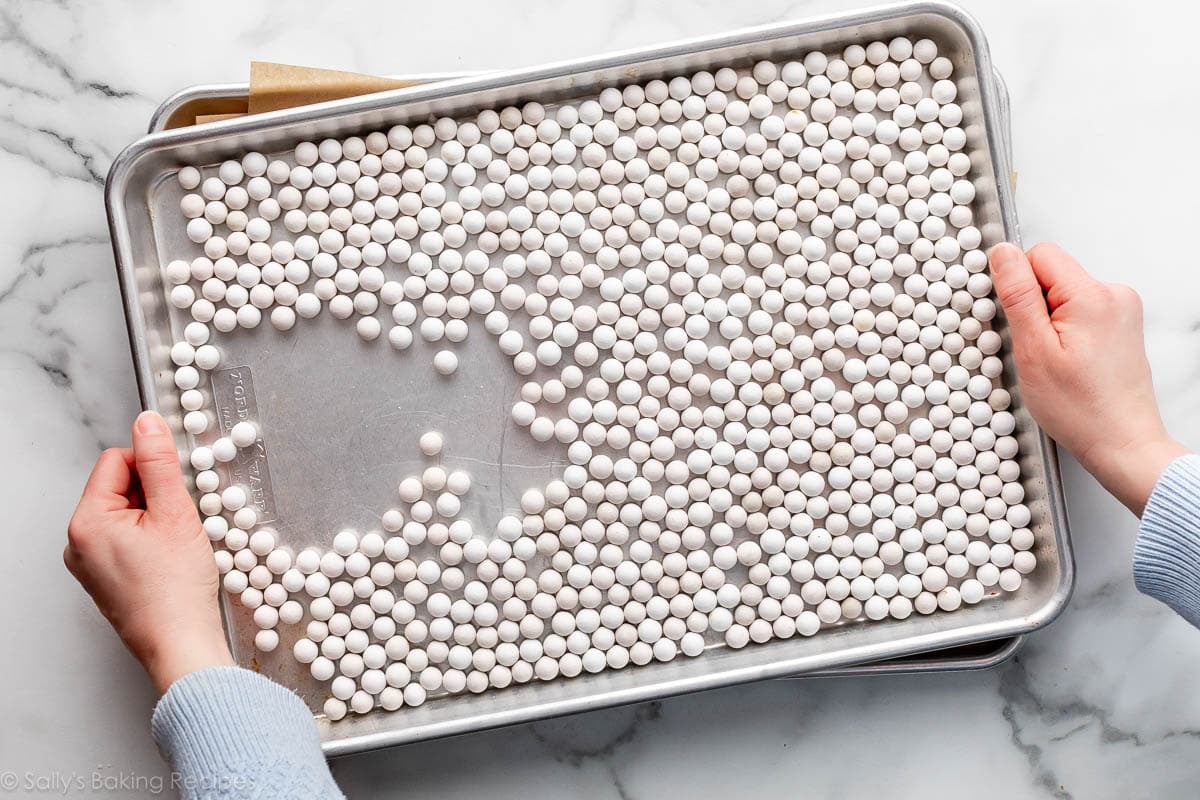
Now right here’s the step not normally included in puff pastry recipes: we’re going to crush the pastry to stop it from puffing up an excessive amount of.
Place one other sheet of parchment paper on high of the pastry dough, then set one other baking sheet on high of that. In case you have pie weights, pour them onto the highest baking sheet. You would additionally use dried beans as an alternative. When you don’t have both, bake it with simply the (empty) high baking sheet, and when it comes out of the oven, set a pan or skillet on the highest baking sheet whereas it cools.
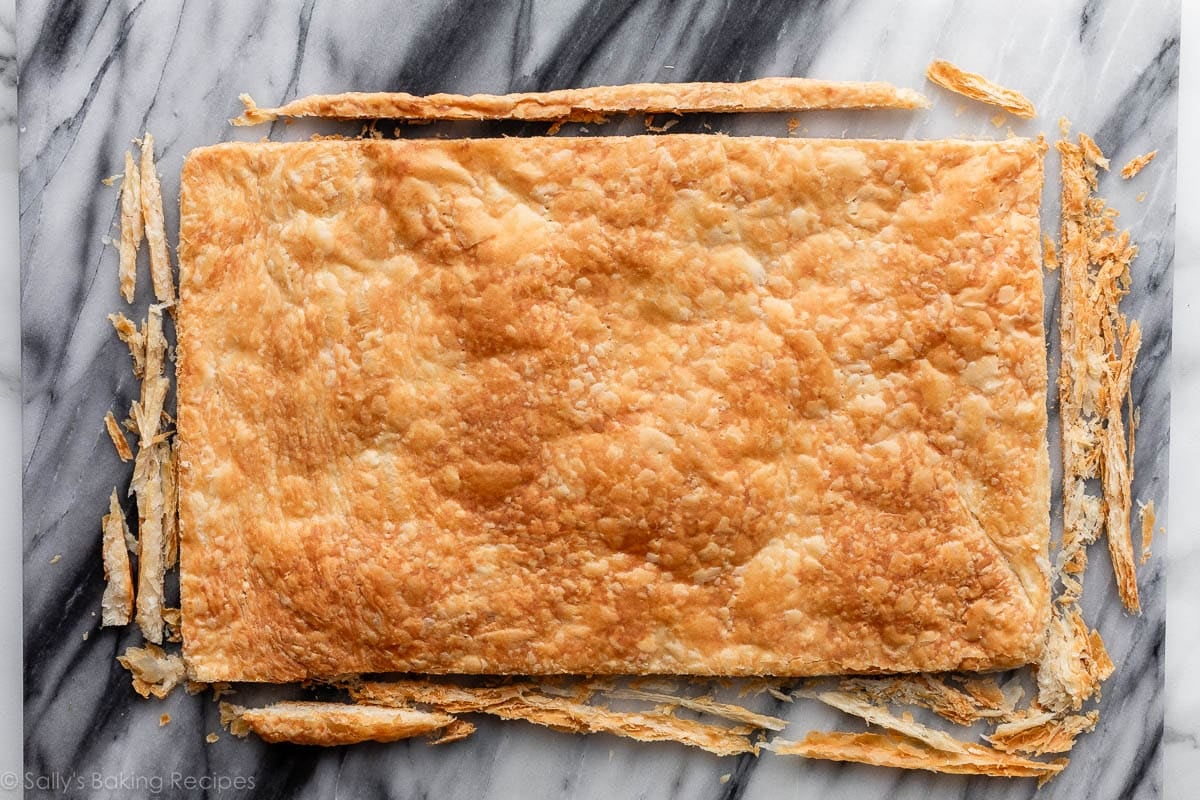
You’ll bake it lined with weights (or no matter you’re utilizing) for 20 minutes, after which uncovered (with out weights) for an additional 7–9 minutes.
Be aware: I discovered that the home made puff pastry will get a lot darker than the store-bought; seemingly as a result of it’s made with butter as an alternative of oil-based fat.
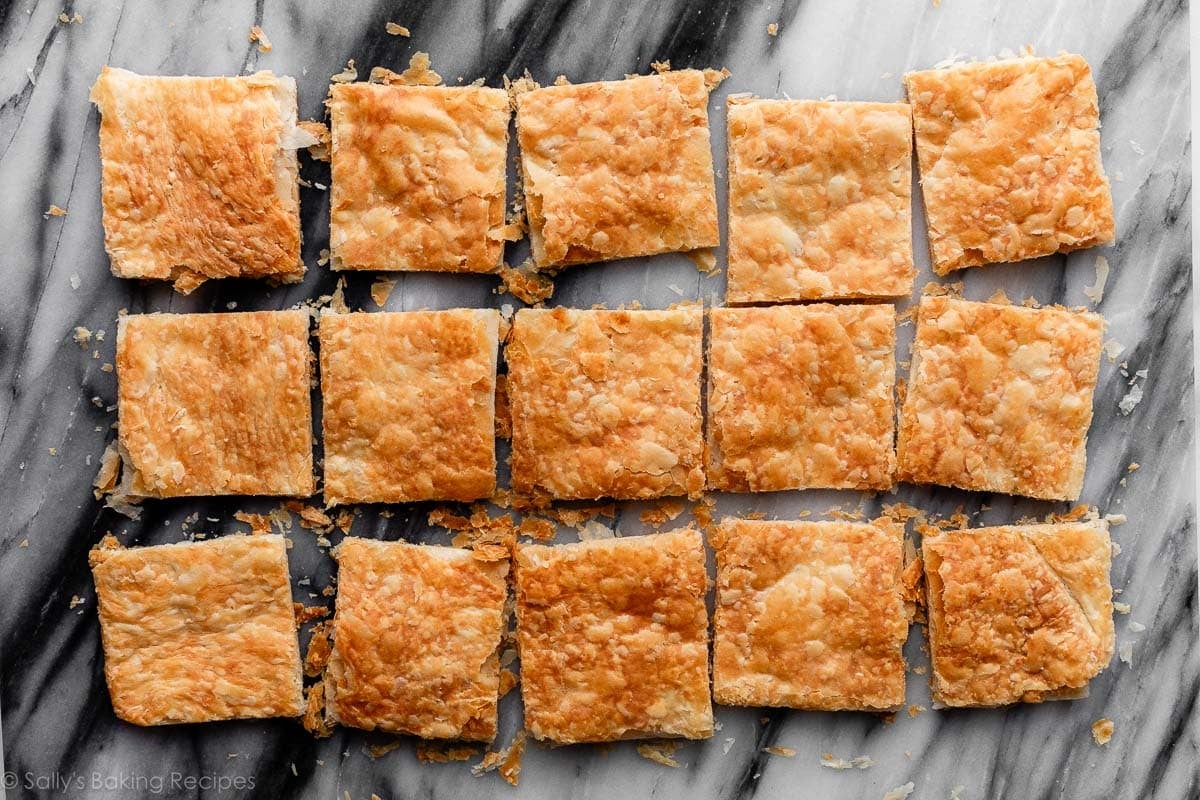
As soon as the baked pastry has cooled, you’ll lower it into 15 (roughly) equally sized items, to make 5 mille-feuille stacks containing 3 pastry layers every.
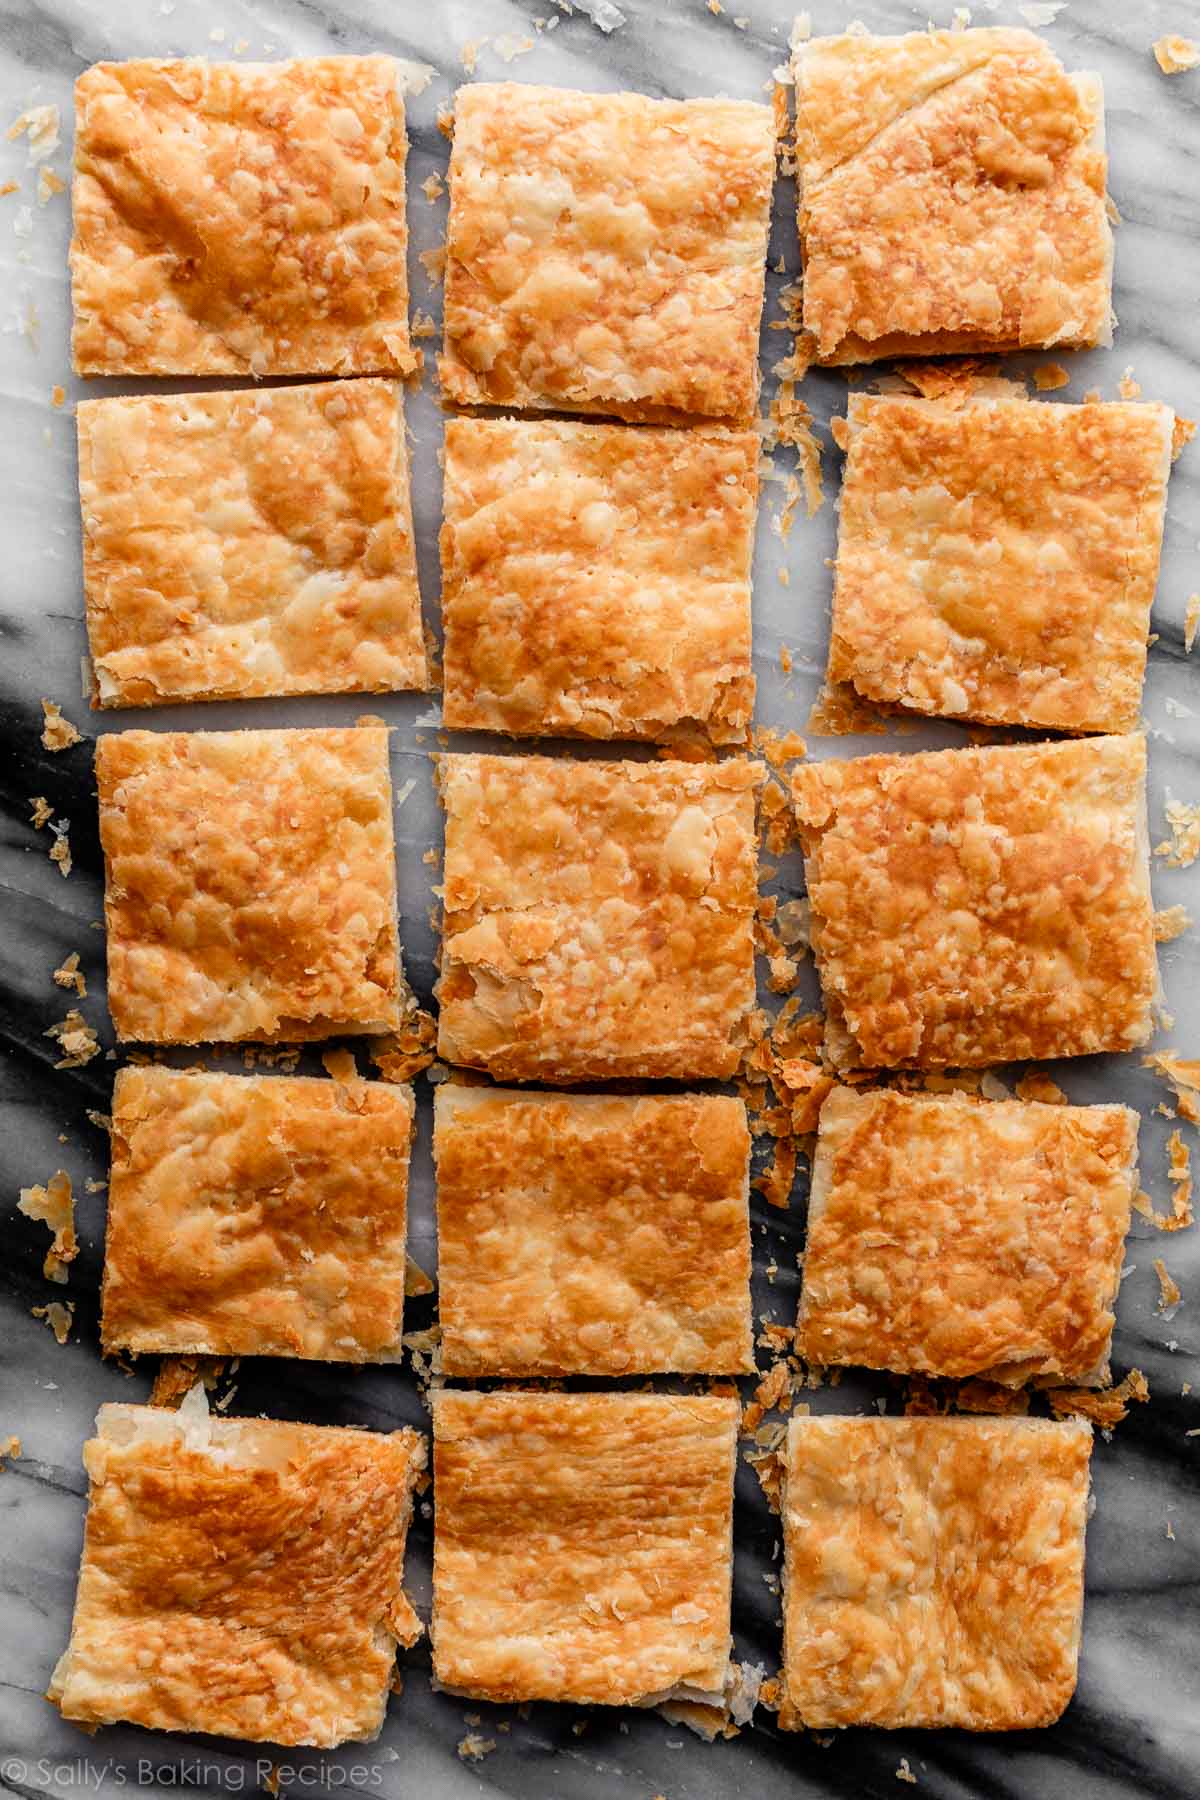
Mille-feuille are sometimes rectangular in form, however I discovered that making them as squares was simpler when it got here to chopping uniform-size items. Once I examined these as rectangles, I discovered they have been both too small and troublesome to assemble, or else made 4 large pastries that have been a lot too giant for particular person parts. I had the most effective success with making 5 assembled 3-inch sq. pastries.
High & Assemble the Mille-Feuille
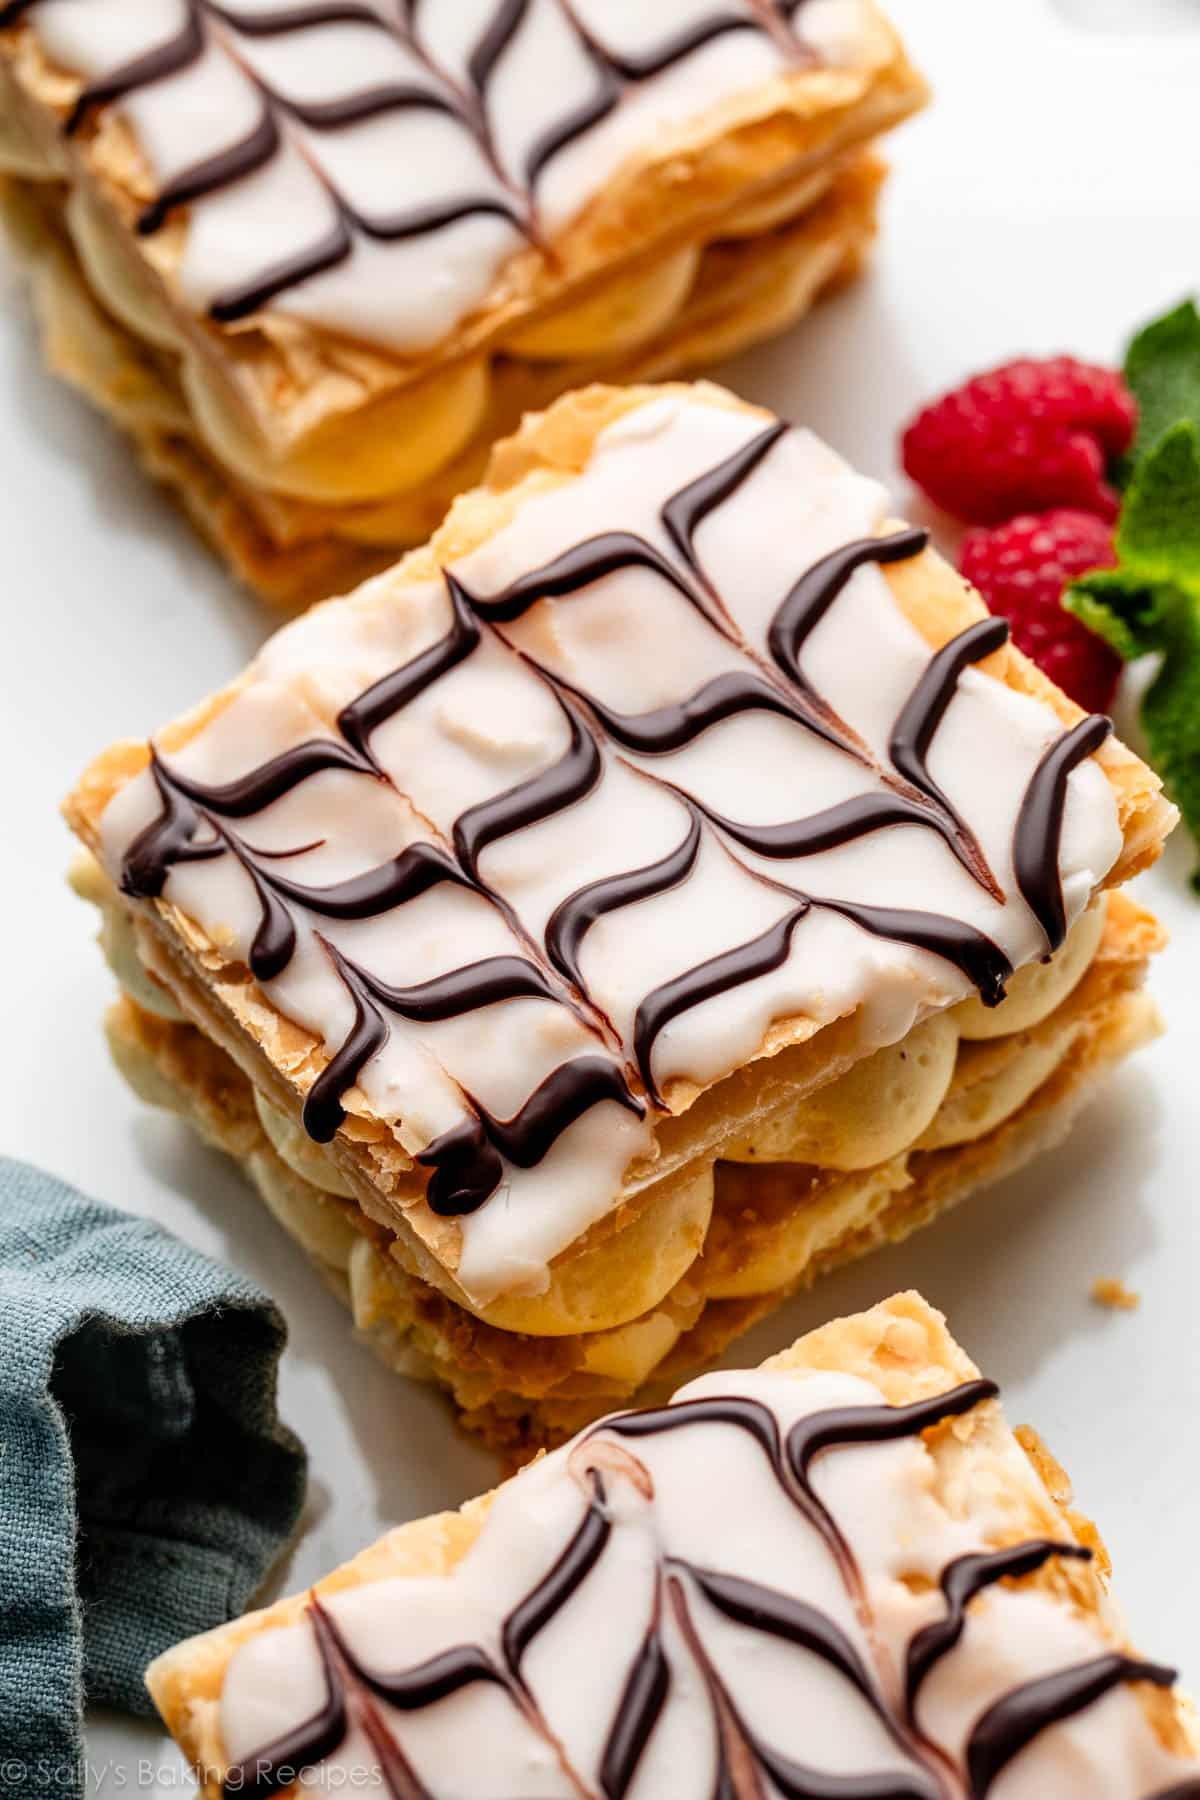
There are numerous methods to high these, starting from a easy dusting of confectioners’ sugar to fanciful swirls of two-toned icing. Some recipes name for royal icing, whereas others use fondant. I like the signature marbled icing look, in order that’s what I’m demonstrating.
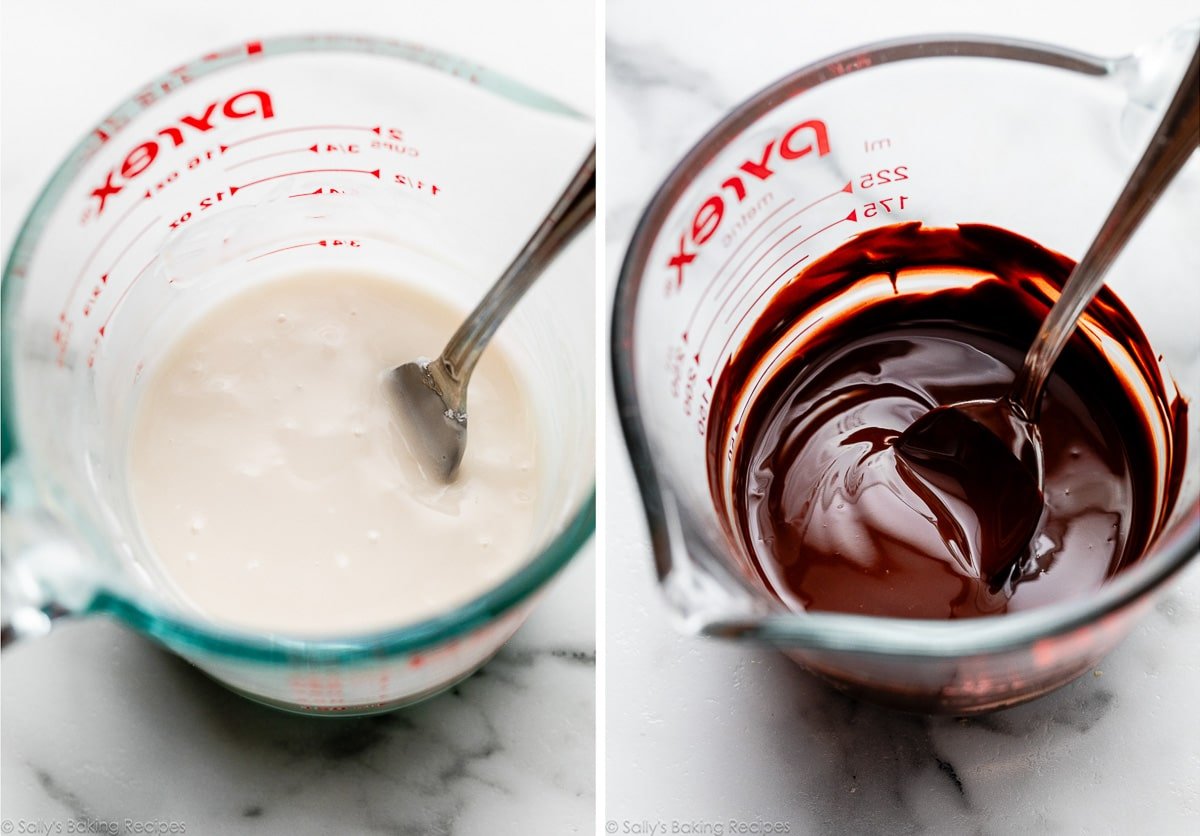
After testing many variations, my style testers and I made up my mind {that a} thick vanilla icing + melted chocolate pairing makes for the tastiest topping. Darkish, bittersweet, or semi-sweet chocolate tastes greatest with the candy vanilla icing. Like I all the time advocate for melting chocolate, chop up a bar of baking chocolate—save the chocolate chips for chocolate chip cookies.
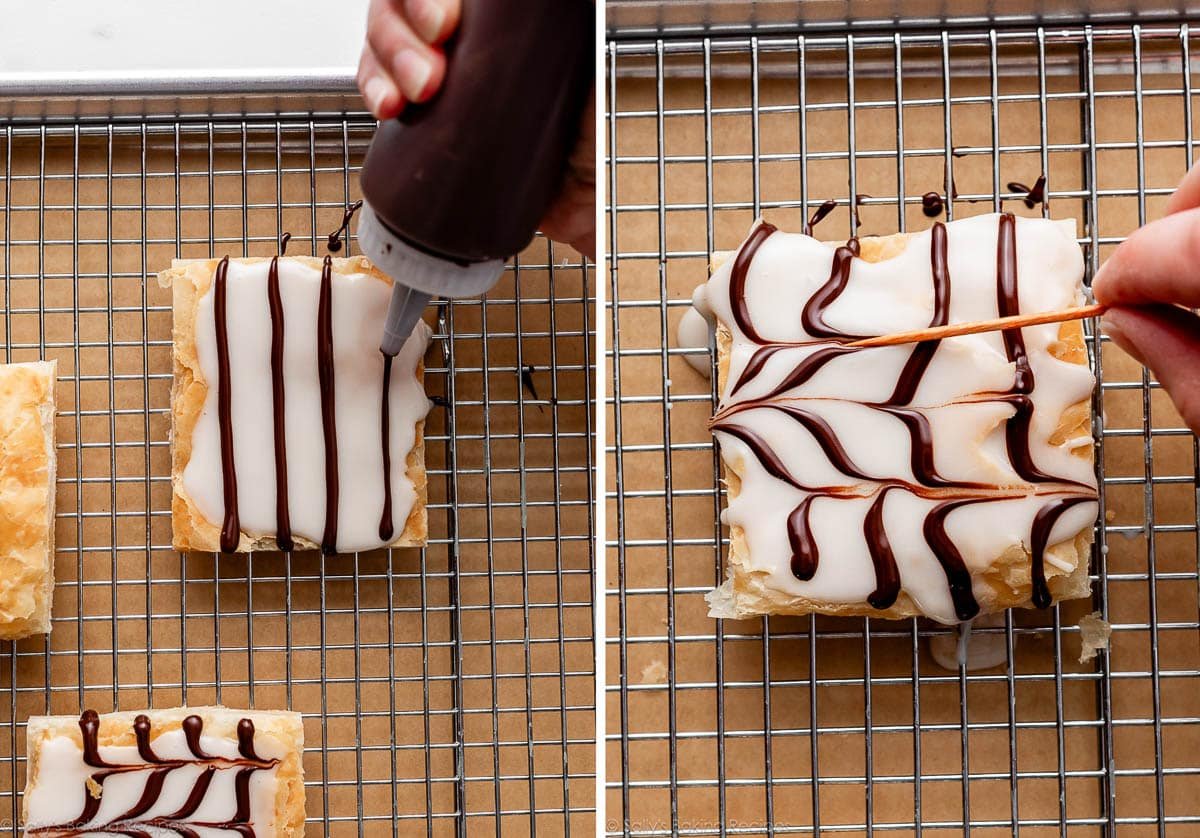
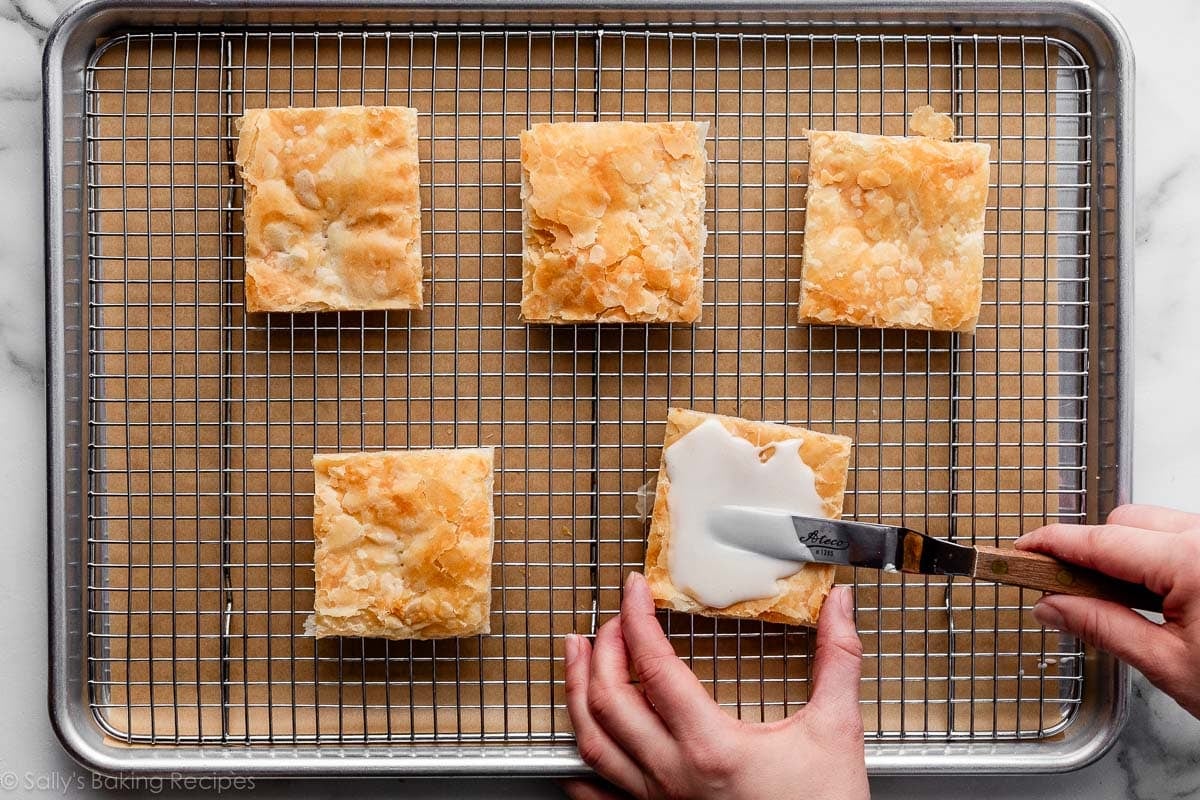
You’ll ice the entire tops first, earlier than assembling, as a result of it’s troublesome to ice the tops effectively after they’re layered on high of a creamy filling. Place the 5 pastry squares you’ll use for the tops on a wire rack. With an icing spatula or a spoon, unfold the vanilla icing on every sq.. Then pipe or drizzle melted chocolate on high. For this, I piped 4 stripes throughout after which used a toothpick to create the traditional chevron design by dragging it in a perpendicular path. Like this:
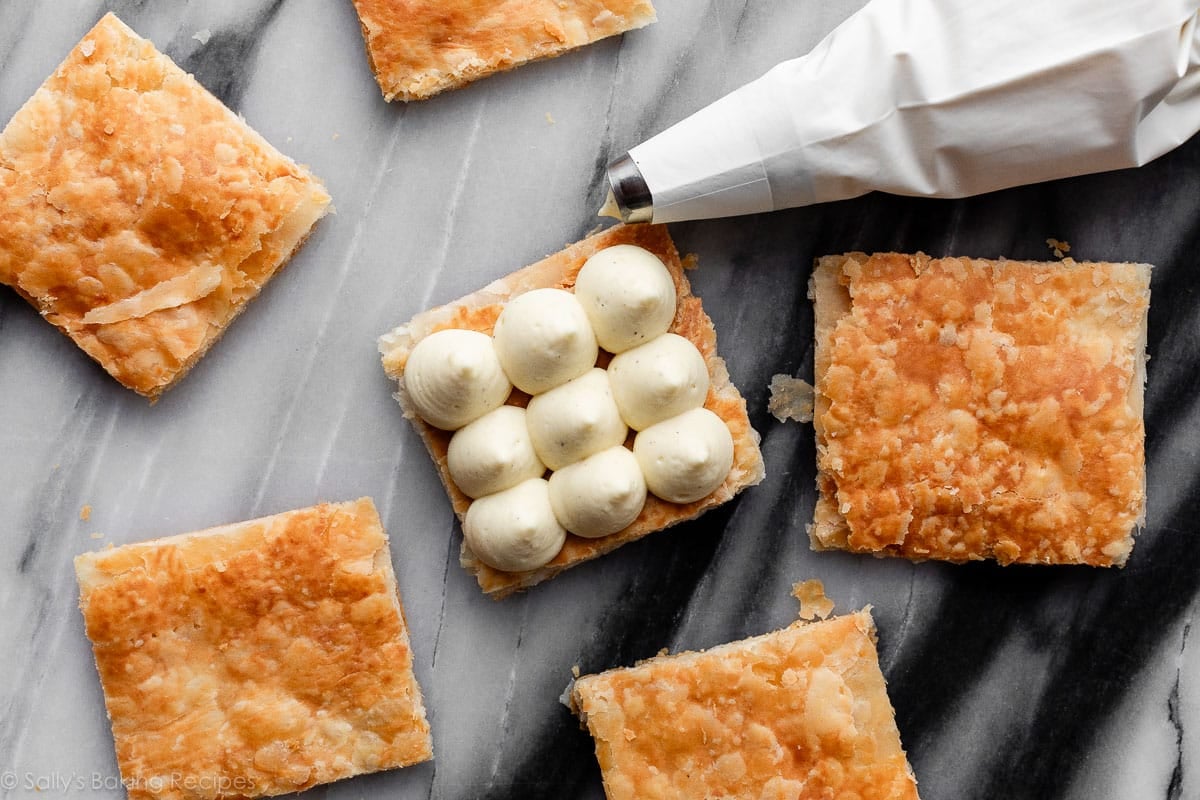
Now let’s fill the pastries. Match a pastry/piping bag with a big spherical tip, equivalent to Ateco 808 (which I exploit for lots of cupcakes—see this piping ideas put up). Or, you’ll be able to merely use a big plastic bag and snip off a backside nook with scissors.
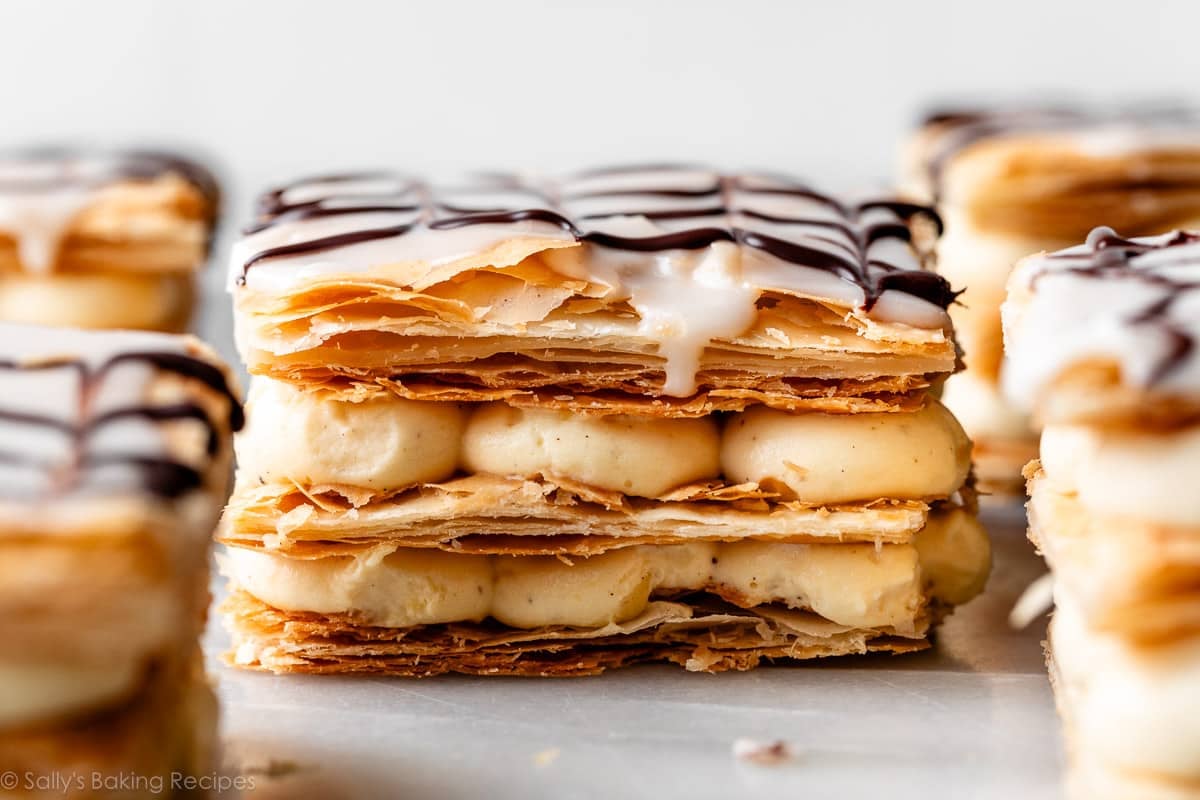
Begin with one plain (un-iced) sq. of pastry and pipe on 3 dollops of cream in 3 rows, so you will have a grid of 9 dollops. Place one other pastry sq. on high of that, after which repeat the piping the identical method. Lastly, place one of many iced pastry layers on high.
Refrigerate the assembled pastries (uncovered) for at least half-hour earlier than serving, simply so that they aren’t toppling over. Like in most pastry recipes, the fridge is your good friend right here.
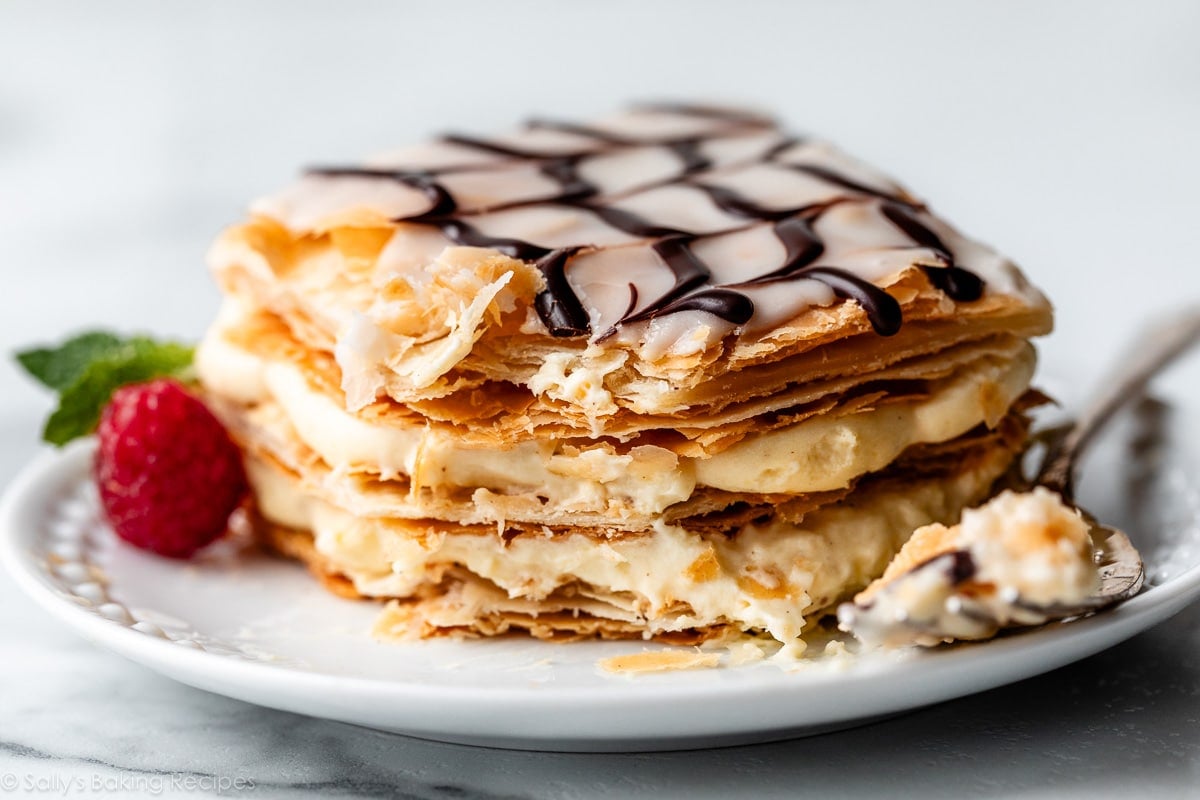
Tips on how to Eat Mille-Feuille
Ahh, sure. Essentially the most troublesome instruction of the day. 😉 On this step, you’ll merely stuff your face with it. However slowly! Savor and revel in each chunk. Respect the time that went into making it!
Plate every mille-feuille and serve with a fork, or you’ll be able to eat it handheld. The longer the assembled pastries sit within the fridge, the extra stable they’ll develop into. However whatever the time it units, the mushy filling will spill out the perimeters if you lower or chunk into it, and that’s wonderful! It’s crispy, it’s creamy, it’s close-your-eyes-and-sigh dreamy.
Sure, completely. However in order for you the problem, and a heightened taste expertise, I strongly encourage you to make use of home made puff pastry. You’ll be rewarded with an optimum taste and texture expertise. And you may actually style that butter within the home made model!
You need to use dried beans. OR you’ll be able to simply add the baking sheet on high and never fill it with weights or beans. (All the time add a bit of parchment paper on high of the dough, although, so the pan just isn’t touching it.) OR because the baked pastry is cooling, place one thing heavy like a pot or pan on high of the highest baking sheet, to crush the baking sheet that’s on the puff pastry. (I’ve completed that final suggestion earlier than and it really works simply wonderful.)
Although it’s the most typical filling on this dessert, you shouldn’t have to make use of pastry cream between the layers. I’ve an inventory of different filling choices under, like mousse or no-bake cheesecake filling.
As a substitute of the vanilla icing + chocolate combo, you’ll be able to merely mud the tops with confectioners’ sugar. You may also skip the chocolate for a plain vanilla icing topping, or skip the vanilla icing and drizzle melted chocolate immediately on high. Or, some recipes name for royal icing. (If you wish to use my recipe for royal icing, I like to recommend halving it.)
Different Filling Choices
Or you’ll be able to nonetheless use pastry cream, or any of the recommendations above, and layer your filling of selection with contemporary raspberries or thinly sliced strawberries and dollops of jam. Or pipe rows of raspberry cake filling between rows of your selection of cream/mousse filling. A lot of choices!
Some Particular Instruments You Want

Mille-Feuille (Napoleon Pastry)
Prep Time: 1 hour, 45 minutes
Prepare dinner Time: 35 minutes (consists of stovetop time)
Whole Time: 5 hours (consists of chilling)
Yield: 5 3-layer squares (every is shareable!)
Class: Dessert
Methodology: Baking
Delicacies: French
Description
From the numerous flaky layers of delicate puff pastry, to the creamy clouds of vanilla pastry cream, to the ornamental marbled icing, mille-feuille is an indulgent dessert worthy of a special day. Discover ways to make this traditional European pastry in your personal kitchen by fastidiously following the detailed recipe under. I additionally embody thorough explanations within the weblog put up above, and step pictures within the recipe directions, to set you up for fulfillment. Evaluate recipe Notes under earlier than beginning.
Dough
Pastry Cream Filling
Topping
Directions
I encourage you to learn by means of this recipe fully earlier than starting, so that you perceive every step and are ready for the varied cooking, cooling, and chilling phases.
- Put together home made tough puff pastry dough by means of 2nd refrigeration. If utilizing store-bought frozen puff pastry, thaw in line with bundle instructions. Maintain both dough within the fridge till step 7 under.
- Make the pastry cream: In a big heatproof bowl (ideally with a pour spout), whisk the egg yolks and cornstarch along with a fork. It could not appear to be it’s going to all come collectively (it is going to be dry at first), however maintain mixing till the combination is thick and mixed. If it’s not coming collectively in any respect, add a number of drops of the milk you want in step 3 to deliver collectively. Put aside at room temperature.
- Mix the milk and sugar in a medium saucepan over medium warmth. Whisk till the sugar has dissolved, then deliver to a delicate simmer. Take away from warmth. Pour the nice and cozy milk and sugar combination in a sluggish and regular stream into the egg yolk and cornstarch combination, whisking all the time. Maintain these egg yolks transferring so that they don’t scramble. Over a sieve, to pressure out any egg yolk solids which will have fashioned throughout tempering, pour the combination again into the saucepan.

- Return the saucepan to medium warmth, and whisk continually. The combination will likely be frothy on the floor at first, after which it’s going to start to thicken rapidly and enormous bubbles will start to burst on the floor. This normally takes about 1–2 minutes. Stand again and use warning. Let the bubbles burst for about 20 seconds, or till the combination has thickened right into a custard- or pudding-like consistency. (For a extra correct check, the custard is finished when the temperature reaches 185–190°F (85–88°C).) Take away from warmth. Whisk in butter, vanilla extract, vanilla bean seeds, and a pinch of salt. Cool for 10 minutes. (You’ll use the heavy cream later, in step 9.)
- Switch the pastry cream from the saucepan to a heatproof bowl and place a bit of plastic wrap or parchment immediately on the floor of the custard, to stop a pores and skin from forming. Refrigerate for not less than 3 hours, and as much as 24 hours. Makes 2–2.5 cups, or about 580–610g.
- Preheat oven to 400°F (204°C). Line a 12×17-inch baking sheet (half sheet pan) with parchment paper. Have a second baking sheet and extra parchment paper out as nicely. Put aside.
- Form the dough: On a floured work floor utilizing a floured rolling pin, roll pastry dough right into a rectangle about 11×16 inches in measurement. (If utilizing store-bought puff pastry sheets, place them facet by facet, with the sting of 1 sheet overlapping the opposite within the heart, and use a rolling pin to stick them collectively as you roll the entire thing out into an 11×16-inch rectangle.)
- Switch the dough to the lined baking sheet. Dock the floor with a fork to permit steam to flee. Place a second piece of parchment paper on high of the pastry dough. Set a second baking sheet, crammed with pie weights (or dried beans, or different choices see recipe Be aware under) on high. Bake for 20 minutes with pan & weights on high. Take away from oven and punctiliously take away the highest weighted baking sheet and the highest piece of parchment. Return the uncovered pastry to the oven for 7–9 extra minutes, or till golden brown. Take away from the oven and funky for 20 minutes on the pan, after which fastidiously carry it and place on a cooling rack to chill utterly.

- End the cream filling: Utilizing a handheld or stand mixer fitted with a whisk attachment, whip the chilly heavy cream on medium-high velocity till medium peaks kind, about 3 minutes. Add the chilled pastry cream to the bowl with the whipped cream. Beat on low velocity till simply mixed and {smooth}. Don’t over-mix. Cowl and refrigerate for not less than 1 hour and as much as 4 hours. You’ll use it in step 12.
- Assemble the pastries: Utilizing a big, very sharp knife, trim across the sides of the cooled pastry to straighten up any uneven edges. Use the knife to chop the pastry into 15 squares roughly uniform in measurement. NOTE: The pastry will shrink some whereas baking. After beginning with dough rolled out to 11×16 inches, after baking it usually finally ends up round 9–10×14–15 inches. So when you’ve got a baked pastry that’s 9×15 inches (after trimming the perimeters), your 15 squares will likely be 3×3 inches. In case your pastry is a barely completely different measurement, don’t panic! Use a measuring tape or ruler to measure the perimeters to find out precisely how broad to house your cuts. Measure the lengthy facet and divide by 5, then measure the quick facet and divide by 3.
- Make & add the topping: In a small bowl, whisk collectively the sifted confectioners’ sugar, milk, and vanilla till mixed and {smooth}. Place the chopped chocolate in a small microwave-safe bowl or liquid measuring cup. Soften in 20-second increments within the microwave, stirring after every increment, till utterly melted and {smooth}. Switch the melted chocolate to a squeeze bottle or a piping bag fitted with a small spherical tip, or use a small plastic sandwich bag and lower off a backside nook. Place 5 pastry squares on a wire rack set over parchment paper. With a spoon or icing spatula, spoon and unfold the vanilla icing on one sq.. Earlier than the icing has an opportunity to set, pipe 4 strains of melted chocolate throughout every high. Use a toothpick to create a chevron design, dragging it throughout the stripes in a perpendicular path. Alternate instructions with the toothpick, wiping the toothpick finish with a paper towel in between every move. Repeat with the remaining 4 pastry squares.
- Assemble the mille-feuille: Match a pastry/piping bag with a giant spherical tip. Or, you’ll be able to merely use a big plastic bag and snip off a backside nook with scissors. Beginning with one of many (plain/un-iced) pastry squares, pipe 3 dollops of cream filling in 3 rows (9 dollops complete). Place one other (plain) pastry sq. on high, urgent down very flippantly. Repeat the piping of 9 dollops on the subsequent layer. Place one of many adorned (iced) pastry squares on high of the second layer of cream filling. Repeat with the remaining pastry squares; you’ll have 5 assembled pastries. Refrigerate uncovered for not less than half-hour earlier than serving, or as much as 8 hours.
- Retailer mille-feuille in an hermetic container within the fridge for as much as 3 days. The pastry will develop into softer and fewer crisp over time.
Notes
- Make-Forward & Freezing Directions: There are a number of methods to get began on this recipe. If utilizing home made dough, you’ll be able to put together it 1-2 days upfront. See tough puff pastry dough recipe for particulars. You may put together the pastry cream 1 day forward of time, see step 5. The baked and cooled puff pastry, both as an entire or lower into squares, is okay lined at room temperature for as much as 1 day. To freeze, after the assembled pastries have been refrigerated for not less than half-hour in step 12 (or till the icing units), you’ll be able to wrap them every in plastic wrap and freeze for as much as 3 months. Thaw within the fridge. You’ll lose a few of that crisp, flaky texture within the puff pastry although.
- Particular Instruments (affiliate hyperlinks): Whisk | Sieve | On the spot-Learn Thermometer | Electrical Mixer (Handheld or Stand) | Rolling Pin | Parchment Paper | Baking Sheet | Pie Weights | Cooling Rack | Small Offset Icing Spatula | Piping Bag (Reusable or Disposable) | Ateco 808 Piping Tip or different giant spherical tip | Squeeze Bottle or small icing tip equivalent to Wilton Icing Tip #5
- Puff Pastry: If utilizing home made puff pastry, be beneficiant with the bench flour when rolling out, to stop sticking.
- Pie Weights: When you don’t have pie weights, you should use dried beans. OR you’ll be able to simply add the second baking sheet on high and never fill it with weights or beans. (All the time add a bit of parchment paper on high of the dough, although, so the pan just isn’t touching it.) OR because the baked pastry is cooling, place one thing heavy like a pot or pan on high of the highest baking sheet, to crush the baking sheet that’s on the puff pastry. (I’ve completed that final suggestion earlier than and it really works simply wonderful.)
- Chocolate: The most effective chocolate for melting and drizzling is the “baking chocolate” bars discovered within the baking aisle of the grocery retailer. I usually use Baker’s or Ghirardelli manufacturers, both semi-sweet or bittersweet. They’re normally offered as 4-ounce bars, so that you’ll want half of 1 for this recipe. Don’t use chocolate chips as a result of they include stabilizers, which stop them from melting into the right consistency.
- Different Filling Choices: As a substitute of pastry cream, you should use the peanut butter mousse filling from these home made eclairs; whipped cream for an additional gentle and barely sweetened filling; flippantly sweetened whipped frosting; the no-bake cheesecake filling from these cheesecake jars; or the mousse filling from this chocolate mousse cake. Or you’ll be able to nonetheless use pastry cream, or any of the recommendations I simply listed, and layer your filling of selection with contemporary raspberries or thinly sliced strawberries and dollops of jam. Or pipe rows of raspberry cake filling between rows of your selection of cream/mousse filling.
- Different Topping Choices: As a substitute of the vanilla icing and melted chocolate combo, you’ll be able to merely mud the tops with confectioners’ sugar. You may also skip the chocolate for a plain vanilla icing topping, or skip the vanilla icing and drizzle melted chocolate immediately on high. Or some mille-feuille recipes use royal icing. If you wish to use my recipe for royal icing, I like to recommend halving it.
- Tailored from a mixture of Bake from Scratch & The Spruce Eats; I made adjustments to the cream filling, used home made pastry (and located baking it as an entire sheet after which chopping into squares to be best), and opted for vanilla icing and melted chocolate as an alternative of topping with royal icing or confectioners’ sugar.
Key phrases: mille feuille, napoleon pastry